As much a part of the national food culture as sushi, various types of curry served with white rice (Kare Raisu, カレーライス) has been an enduring favorite in Japan since the Meiji era (1868-1912). Known as “curry rice” or “rice curry”, these days they usually contain meat or poultry, potatoes, carrots, and onions. Unlike Indian curries, however, for which the spice mixture is created fresh each time, the Japanese dish uses curry powder (such as S & B Oriental Curry Powder) – which came from Britain and was first sold in Japan in 1930 – with flour as a thickener.
Curry Rice: The Ideal Meal?
It is a big family favorite here (my daughter often replaces the chicken with firm tofu and even adds in fresh shiitake mushrooms sometimes) and a great addition to your culinary repertoire. Fast, easy, savory, and delicious…what more do you want in a weekday meal?! Be warned: Japanese curry can be thicker than you may be used to and not ultra-spicy (unless you use one of the ready-made ‘hot’ curry roux packs) but it has a very alluring flavor and my biggest suggestion is to make double the amount to have some extra in the freezer or for another meal!
The earliest curry recipes are found in two cookery books published in 1872. Seiyo Ryori Shinan (A Guide to Western Cooking), written by the owner of a bookstore called Keigakudo, featured a recipe for frog curry quite unlike any curry eaten in Japan today. As well as frog meat, it included leeks, shrimp, garlic, ginger, butter, salt, flour, and curry powder, and was boiled for one hour. One can only wonder about the taste! Later in the same year, the first chicken curry recipe appeared in Seiyo Ryori Tsu (The Western Cooking Expert) by the noted journalist, Robun Kanagaki.
The Origin of Curry Rice
Curry rice’s real popularity can be traced back to the Japanese military, which began serving it at the end of the Meiji era and the beginning of the Taisho era (1912-26). It was considered the ideal meal, using only one bowl yet incorporating rice, vegetables, and meat. It also became popular in rural areas during harvest time, being easy to make, substantial, and cheap. Nowadays, a whole range of instant curry roux (with varying levels of spiciness) is part of Japanese life, and curry remains a perennial favorite for take-out, restaurants, and for the home cook.
If you make this recipe and love it, please come back and give it a 5-star rating ⭐⭐⭐⭐⭐ It helps others find the recipe! ❤️ Above all, I love to hear from you. Then snap a photo and tag me on Instagram! I would love to see your creation.
4tbspJapanese curry powder (such as Oriental S & B Curry powder), or to taste
4tbspwhite flour
5-1/2 cups unsalted chicken stock
1small red apple, peeled and finely grated (grate just before using to prevent discoloration)–I used Fuji
2 bay leaves
1tbsp tomato ketchup
Salt and black pepper to taste
1.5lbsskinless, deboned chicken thighs or breast, cut into large bite-sized pieces
3 medium potatoes, peeled and cut into large bite-sized pieces
2 carrots, peeled and cut into large bite-sized pieces
1large onion, peeled and cut into eighths (wedges)
1tbspsoy sauce, or to taste
Cooked & hot Japanese white rice
Optional Garnishes:
Rakkyo pickles ( a type of Japanese shallot)
Kizami pickled ginger
Fukujinzuke relish
Instructions
In a deep frying pan, heat 2 tablespoons of oil and 2 tablespoons of butter. Sauté the garlic and ginger briefly, then add in the sliced onions and sauté over medium heat, stirring, until brown – about 20 minutes. (Note: Caramelizing the onions adds another layer of flavor and depth to your curry.)
Next add in 2 tablespoons of curry powder, sauté briefly, then add the flour and sauté for a few minutes more, stirring constantly, until well combined. Little by little, add in the chicken stock, stirring continuously, to make a thick roux, and bring to a boil. Add in the grated apple, bay leaves, and ketchup, and simmer for 15-20 minutes, or until the sauce thickens. Remove any scum.
Meanwhile, salt and pepper the chicken. In another pan, heat the remaining oil and butter, and sauté the chicken until it becomes brown on both sides.
When the sauce is ready, remove the bay leaves, add in the chicken, vegetables, salt, and pepper to taste, 2 more tablespoons of curry powder (or more if you want), and the soy sauce. Cook, covered, over medium heat for 25 minutes, stirring occasionally. Meanwhile, cook or reheat the rice. Adjust the curry seasoning to taste and serve hot over rice. Pass the garnishes separately.
Notes
It is a matter of personal preference how thick you like the roux. In Japan, it can be anywhere from very thin and watery to very thick, especially if you decide to use ready-made roux. This recipe is in the medium thickness range. Play with it and see what variation you like. It is a very forgiving recipe!
I get a lot of potatoes in my bi-monthly CSA box, so I have been making Small Potatoes in Sweet Sauce with fresh Ginger recipe quite a bit. It makes for a great and easy side dish.
Small Potatoes in Sweet Sauce with fresh Ginger Recipe
And since I freely admit to being a history nerd, I also love collecting old books about cooking in Japan, both in Japanese and in English. They range from a volume in Japanese dating back to the late Meiji period (1868-1912) to a curious tome written in 1948, during the U.S. Occupation (1945-52). Its rather overblown title is The American Way of Housekeeping of the Women of the Occupation by the Women of the Occupation for the Women of the Occupation. No single writer is acknowledged, only groups such as the American Women’s Guild, Cavalry Officers’ Wives, and Navy Officers’ Wives. Another similar book, recently reprinted, is called simply American Recipes. First published in 1939 by the Yokohama chapter of the Daughters of America, it was meant to assist Japanese cooks in preparing both Western and Japanese dishes to suit the tastes of the foreigners living in Yokohama.
Need books?
I’m buying mine from Abe Books now in an effort to support smaller businesses. They have new and used options and harder to find books, including all of my favorite Japanese cookbooks!You can support Thanks for the Meal by clicking on this banner to buy your books.
Arigatou Gozaimasu / ありがとうございますいます –Lucy
Looking at these two books (both of which, incidentally, are bilingual), particularly The American Way, it is apparent that the Occupation forces really brought home cooking and housekeeping methods with them when they came to Japan. It is also apparent that ready access to U.S. base commissaries allowed them to maintain a standard of dining quite lavish for those times. Recipes in The American Way, for example, include baked ham with champagne, beef stroganoff, and a fine three-layer cake. The book’s opening chapters provide descriptions of a typical breakfast, lunch, and dinner in 1948, as well as instructions for the housekeeper and cook on how to set the breakfast tray, clean the house, do the laundry, store food, and polish silver!
For the vast majority of Japan’s inhabitants, however, the period during which these books were published was a time of acute food shortages. Rice was strictly regulated by the government via consumption allowances and price controls. Diners had to have a rice coupon to order rice at a restaurant, a practice that was continued for a time even after the war ended.
Sweet Spuds: A Good Potato Dish From Hard Times
By the close of World War II, in fact, there was virtually no rice to be had in the country. Vegetables were being grown outside the Diet (Parliament) building in Tokyo, and many Tokyoites were forced to scour the countryside for food on a regular basis. Sweet potatoes, pumpkins, and potatoes were some of the more accessible starch substitutes for the rice that serves as the mainstay of the Japanese diet. Several recipes, including the one below, adapted from a 1938 book called Nichi-nichi katsuyo ryori jiten (Encyclopedia of Practical Everyday Cooking), put out by the NHK television network, took advantage of that relative abundance.
If you make this recipe and love it, please come back and give it a 5-star rating ⭐⭐⭐⭐⭐ It helps others find the recipe! ❤️ Above all, I love to hear from you. Then snap a photo and tag me on Instagram! I would love to see your creation.
Pour the salt into a medium-sized bowl of cold water. Add the potatoes, lightly scrubbing them under the water with your hands to get rid of excess starch, then drain and rinse them in more cold water. If they are a bit large, cut them into chunks.
Place the potatoes in a saucepan, add enough water to cover, then add the vinegar. Bring to a boil and cook until done, about 8 to 10 minutes. Check for doneness. Drain the potatoes and lightly rinse them in cold water.
In another saucepan, boil the mirin for one minute. Add the potatoes and dashi stock, bring to a boil again, and add the soy sauce and sugar. Partially cover the pan, and cook until 80 percent of the stock has boiled off. Shake the pan occasionally to help color the potatoes with the sauce. Remove the potatoes from the heat, drizzle with leftover sauce, top with ginger, and serve at room temperature.
Notes
Try making the same recipe with sweet potatoes if that is all you have on hand or prefer to white potatoes.
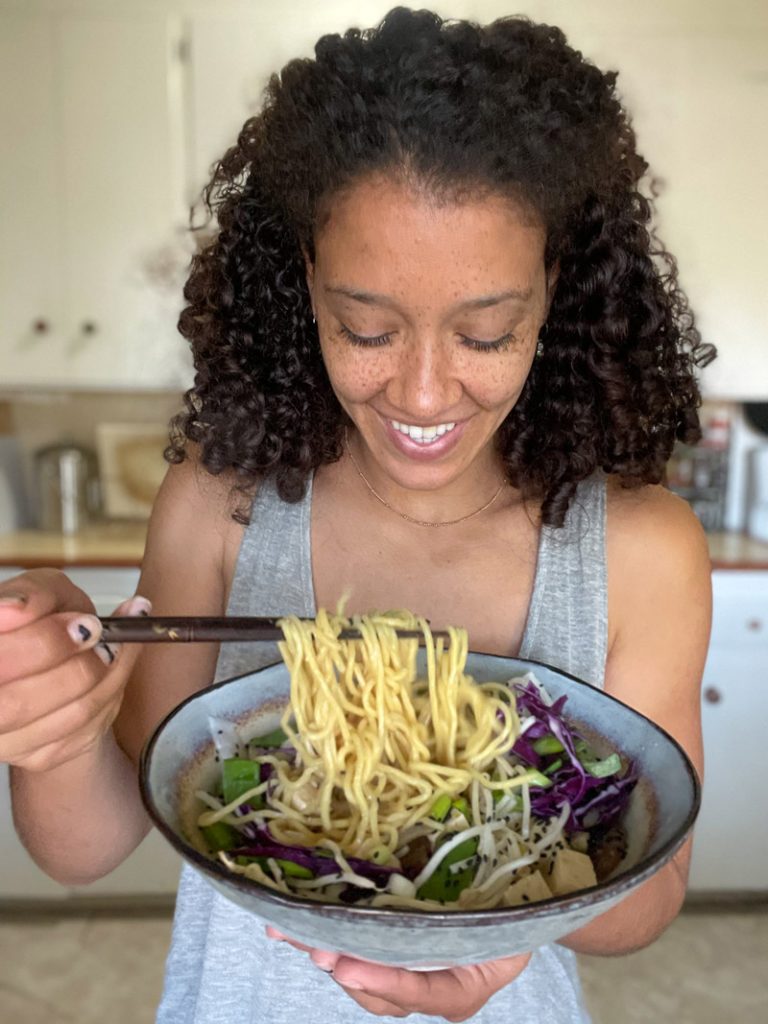
I am a noodle fiend. It doesn’t matter if they are smothered in sauce, pan-fried, or sitting in broth. I am a lover of noodles!
One of my favorite dishes is ramen and I thought how perfect; I can recreate a Japanese staple and transform it into a plant-based dish.
Posts may include affiliate links, so without costing you anything extra, I (Lucy) will earn a small percentage of the sales if you purchase these items through these links. Thank you for your support!
Plant-Based Ramen Recipe
What is the difference between a plant-based diet and a vegan diet?
A plant-based diet focuses on eating whole foods (fruits, vegetables, grains, nuts, and seeds), meaning the food is as close to its natural state as possible. There are no processed or refined foods consumed in this way of eating.
The vegan diet eliminates all animal products but it encompasses much more than that. It’s a lifestyle. It expands to all aspects of your life. Some people go vegan for ethical, environmental, and/or health reasons.
For example, a vegan will not buy leather products such as purses, shoes, a couch, etc. They will not buy anything with animal bi-products such as beeswax in chapstick. And they will not buy cosmetics that have been tested on animals.
Another big distinction between the two is that vegans do not necessarily concentrate on “clean” whole foods. You may have heard the term “vegan junk food.”
Let’s talk about Ramen Broth
When it comes to soups, it’s all about the broth.
Miso is one of my most used ingredients in the kitchen. It’s salty, bold, and has that beautiful umami flavor that adds that extra something special to a dish.
Tahini and plant mylk make this broth both creamy and hearty. I suggest using unsweetened soy milk or coconut milk. You can use other types of plant milks but make sure it is plain and unsweetened. You don’t want vanilla in your ramen…yuck!
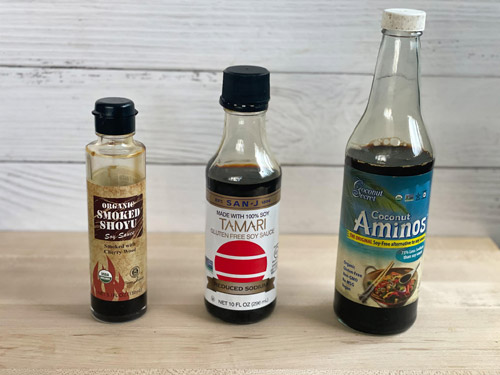
Shoyu is Japanese soy sauce that is made from fermented soybeans, wheat, salt, and water. If you ever see smoked shoyu BUY it! It’s amazing. Take my word for it. Personally I get my smoked shoyu from The Japanese Pantry.
Coconut aminos (sweeter than soy sauce) and tamari (soy sauce made without wheat) are two more staples I use in the kitchen almost every single day.
Get FREE Japanese Recipes by Email! Sign Up Now!
Get Lucy’s ebook, “How to Make Traditional Japanese Salad Dressings” FREE when you subscribe.
Thank you!
You have successfully joined our subscriber list.
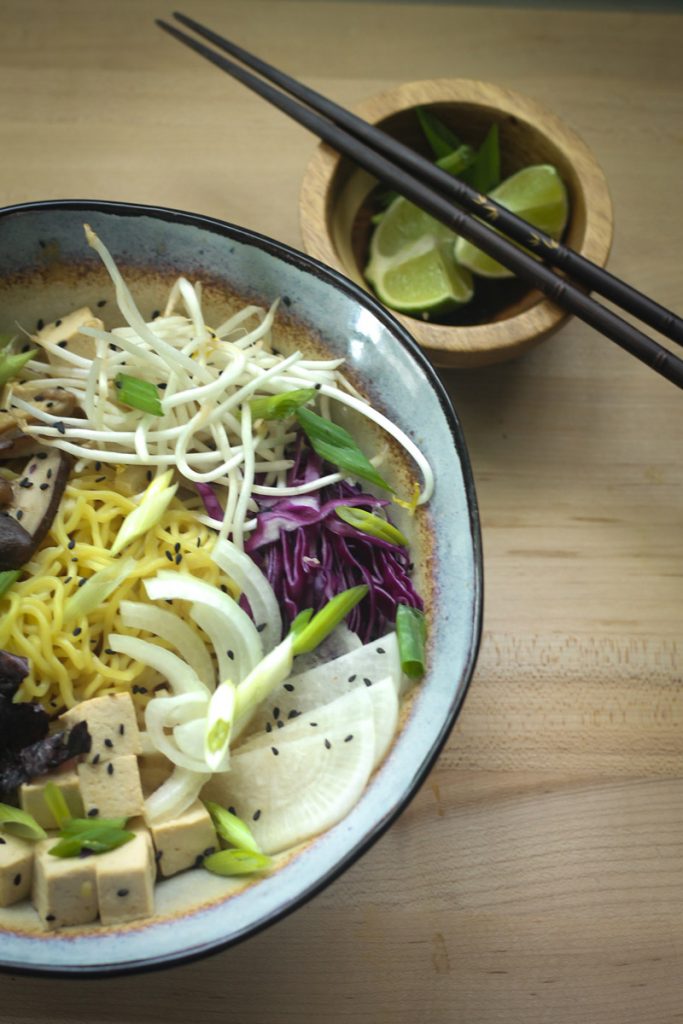
How to Make a Plant-Based Ramen
Serves 1
Ingredients:
2 cups water
2 tbsp miso paste (yellow or white)
2 tbsp coconut aminos
2 tbsp tamari or low sodium soy sauce
1 tsp (smoked) shoyu
1 tbsp tahini paste
½ cup plant mylk
1 serving fresh ramen noodles (cooked to package directions)
Use any veggies you have in the fridge. I am using:
1/3 cup snap peas
¼ cup bean sprouts
¼ cup shiitake mushrooms, sliced
¼ cup daikon radish, thinly sliced
¼ onion, thinly sliced
1/3 cup cabbage, thinly sliced
½ cup tofu, water pressed out and cubed
Optional Garnishes:
1 tbsp nori
1 tbsp green onion, thinly sliced
Sprinkle of sesame seeds
½ lime
Instructions:
Cook your ramen according to the package directions. Once cooked, drain and rinse under cold water so you stop the cooking process. Set aside.
In a medium pot on medium heat, add the water, miso paste, coconut aminos, tahini, shoyu and tamari. Whisk together until the miso paste has completely dissolved.
Add in the tofu, onions, mushrooms and let simmer for about 5-10 minutes. This will allow tofu and mushrooms to absorb some of that beautiful broth.
While the broth is simmering, prep your veggies and optional toppings.
In a bowl, add your ramen noodles and ladle the broth over them making sure to get all of the onions, mushrooms, and tofu. Add your sliced veggies and any toppings you’d like.
Note:
Feel free to adjust the amount of veggies. The measurements provided are just an approximation to help guide you.
If you don’t have coconut aminos or tamari feel free to just use low sodium soy sauce.
If you don’t have tahini feel free to skip it! The broth will still turn out delicious.
You can use regular shoyu if you can’t find smoked or omit it completely if you’d like.
Make sure to use a plant mylk that is plain and unsweetened (soy milk, coconut milk, almond mylk, or cashew mylk). I have only used coconut and macadamia nut mylk but any of the others should work.
No need to cook your veggies. They will lightly steam in the broth.
That’s it. This ramen is full of flavor, packed full of good-for-you nutrients, and it takes under 15 minutes to make!
Pip Harrigan is a food lover and one of her biggest passions in life is feeding people and teaching them about food. Her two main goals when it comes to food are First, nourishing your body with food which is actually a form of self-care. It’s something she instills in her clients. Second, she wants to help change the misconceptions that surround vegan and plant-based food. Her goal is to show people that these foods can be just as delicious and fun to eat as any other diet out there. She can be found in her Facebook group and on Instagram.
In 1927, the second year of Emperor Showa’s Reign (1926-1989), Fyodor Ivanovich Chaliapin, the renowned Russian operatic basso, visited Tokyo. He was a true VIP, often earning as much as ¥30,000 for one performance, at a time when you could build a house for ¥1,000. In Tokyo, he stayed at the Imperial Hotel, near the Imperial Palace.
The chefs at the Imperial Hotel were very nervous about Chaliapin’s visit, since he was known to have very pronounced culinary tastes. The only fish he ate were salmon and herring, and when it came to meat he would touch only beef and chicken. He had a particular love of beef and ate it almost every day.
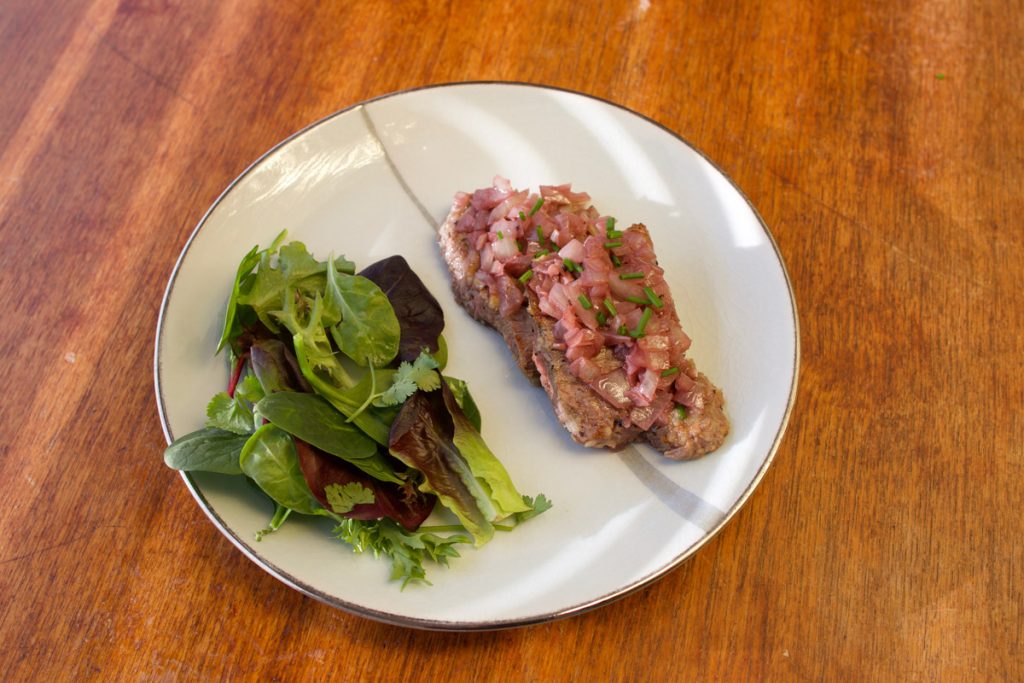
A uniquely Japanese steak dish
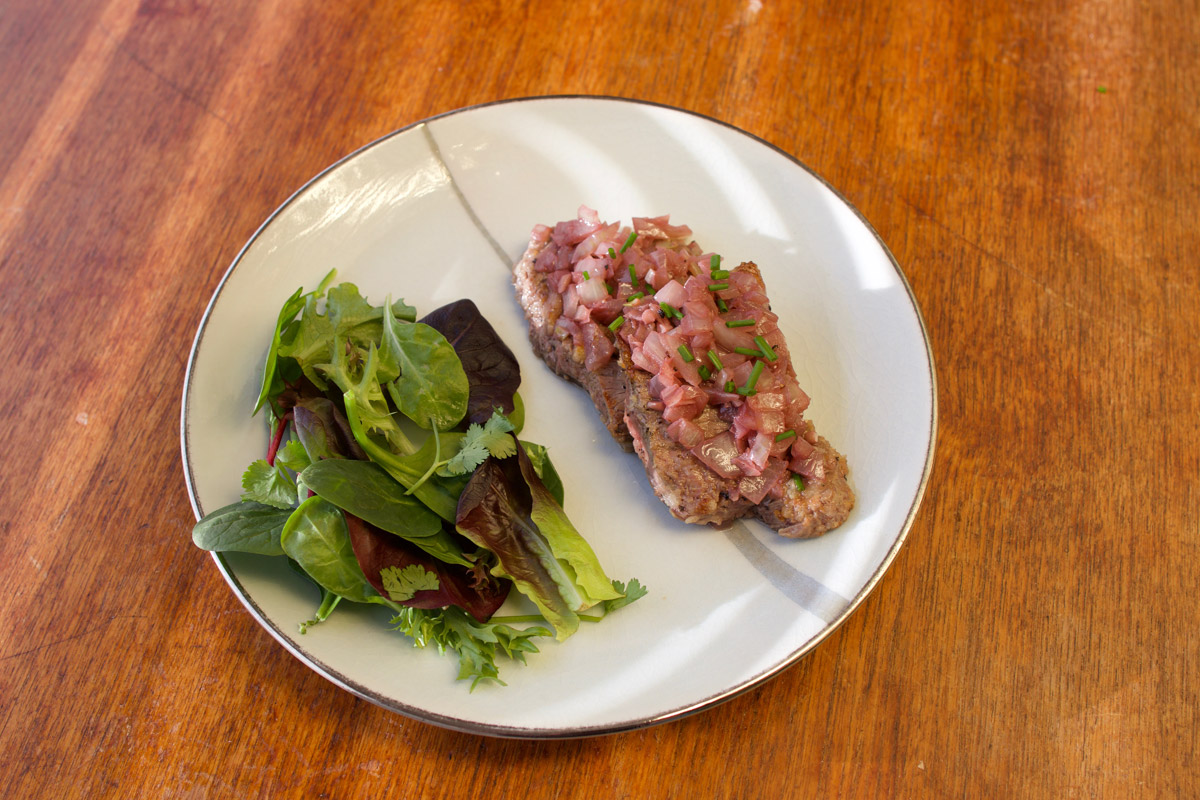
One day during his visit, Chaliapin developed tooth trouble and had to visit a local dentist. He came back to the hotel minus a number of teeth – but still hungry. Chef Fukuo Tsutsui of the hotel’s Grill Room wracked his brains to figure out a steak dish that Chaliapin could eat and enjoy. A secretive character, he waited until all the other chefs were on their lunch break and then sneaked into the kitchen, where he pounded a steak to tenderize it, soaked it in onion juice for thirty minutes, sautéed it, and topped it with cooked onions. Chaliapin was in heaven! The president of the hotel, Mr. Inumaru, promptly dubbed it, with Chaliapin’s blessing, Chaliapin Steak – still served today at the Imperial Hotel.
VIP Beef
We might never have found out the secret of Chaliapin Steak if it hadn’t been for the disruptions of World War II. In those days, it was common to give some sort of farewell present to a soldier setting off to battle. Chef Tsutsui gave as his farewell present to a departing junior chef, Nobuo Murakami, the secret of tenderizing steak with onion juice. His parting words to Murakami were: “You will die, so I will tell you.” Happily for us – you’ll never taste a more tenderer and delicious steak for so little effort – Thankfully, Nobuo Murakami came home safely, was known for his innovative culinary contributions to the 1964 Tokyo Olympics, and later became chief chef of the Imperial Hotel in 1969.
Get FREE Japanese Recipes by Email! Sign Up Now!
Get Lucy’s ebook, “How to Make Traditional Japanese Salad Dressings” FREE when you subscribe.
4good-quality boneless steaks, about 5-6 oz. each(Used NY strip steak, trimmed of excess fat)
2 large white onions, peeled and pureed(Used a food processor)
2tbspunsalted butter
salt and pepper to taste
Sauce
4tbspunsalted butter(Keep back 1 tbsp cold cubed butter to finish sauce)
1medium onion, peeled and chopped
2tbspfinely chopped garlic
2tbspCognac
1/2cupdry red wine
Salt and pepper to taste
Garnish
Choose one: 4 sprigs of watercress, minced parsley or minced chives
Instructions
Place the steaks in a non-aluminum container and top with pureed onion. Let stand for 15 minutes, then remove the onion, turn the steaks over, cover with onion again and let stand a further 15 minutes. Scrape off the onion and discard it. Pat the steaks gently on both sides with a paper towel to dry. Salt and pepper the steaks to taste.
Melt the 2 tablespoons of butter in a pan and sauté the steaks to desired doneness. Remove from pan and keep warm.
To make the sauce, melt 3 tablespoons butter in the same pan and sauté the onions and garlic until translucent and softened. Carefully add the cognac and cook for a minute or two. Add the red wine carefully and cook over high heat until the sauce starts to thicken. Season to taste. Just before serving, add the remaining tablespoon of cold cubed butter and stir to combine to finish the sauce. Pour over steaks and serve immediately. Garnish with watercress, parsley or chives if you like.
Snap a pic and hashtag it #thanksforthemeal — I would love to see a photo of your Chaliapin Steak on Instagram and or Facebook, or leave a note in the comments section (see below) and let me know!
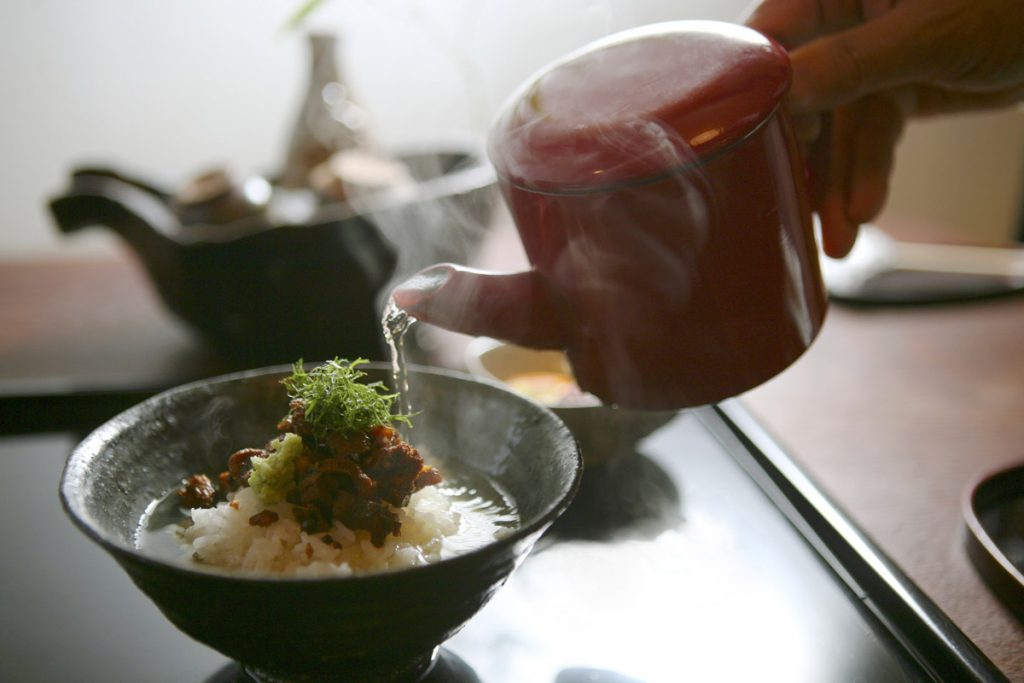
Keeping with our theme of quick, versatile, and easy to eat and make rice dishes (like Zosui), here is another traditional favorite of mine, chazuke. I like to make it when I am in a hurry to get dinner on the table and also when I have left-over rice.
What is Tai Chazuke?
Simply put, chazuke is either hot or cold cooked rice, topped with a variety of ingredients and then immersed in either hot strong green tea or dashi stock. We have samurai warriors and Buddhist priests to thank for chazuke, a venerable Japanese fast food that remains popular to this day.
This particular recipe uses tai(sea bream) and dashi stock, but of course, there are endless variations. If we use green tea instead of stock, then it would be called Taicha, which is quite popular at the moment. Cha meaning tea and zuke meaning to submerge. Most likely this dish originated in Kyushu, which is famous for its sea bream.
Chazuke remains a popular craze, with a variety of instant, dried and inexpensive toppings (furikake), such as the well-known Nagatanien brand used. There are even gift sets of more sophisticated and pricier chazuke flavors available.
The practice of mixing rice with a liquid began in earnest back in the Heian era (794-1185), when aristocrats poured hot water over cold rice in the winter and cold water over the rice in the summertime. This was thought to disguise the taste of rice that was occasionally poor in quality.
Fast Food From The Past
By the Muromachi era (1333-1568), the standard breakfast for samurai was rice, miso soup, and pickles. During the civil wars that raged in the latter half of this era, samurai were asked to be frugal as an example to the populace, so they often poured their soup over their rice to create a single dish. This was known as nekomeshi, or “cat’s meal,” because pouring soup on rice for cats is to soften the rice to make it easier for them to eat. Since it was filling and quick to make, this dish became a samurai staple.
The forerunner of modern Ochazuke
Hoban or hohan, the forerunner of modern chazuke, was also being eaten by Buddhist priests during the same period, and soon found its way onto the menus of high society. It was served to guests during the tea ceremony, which also developed during this time. The principle was the same: cooked or flavored ingredients (such as vegetables already cooked) were placed on top of rice, and then covered with either green tea or weak dashi stock. It was beautiful to look at and easy to prepare – a perfect offering for unexpected guests.
By the middle of the Edo era (1603-1867), a greater variety of colorful, flavorful toppings were in use, spurred on by the influence of kaiseki (Japanese haute cuisine) and newly sophisticated tastes. It didn’t matter if the rice was hot or cold, but the tea or stock had to be really hot, since it helped cook any raw toppings such as fish.
Regional Variations of Ochazuke
Regional versions of chazuke can also be sampled around Japan. On Shikoku Island, the local version is called bokkake. Bokkake’s main ingredient varies from place to place – rabbit and mackerel are two that come to mind. The main ingredient is cooked together with lots of different vegetables, almost like a stew, and then everything is laid over hot rice. In Okinawa, a number of chazuke variations with a Chinese influence are made. The only difference is that the stock is made from both pork and fish.
Get FREE Japanese Recipes by Email! Sign Up Now!
Get Lucy’s ebook, “How to Make Traditional Japanese Salad Dressings” FREE when you subscribe.
9ozs(250g) sliced very fresh sashimi-grade tai (sea bream), cut sashimi style
3tbsp soy sauce
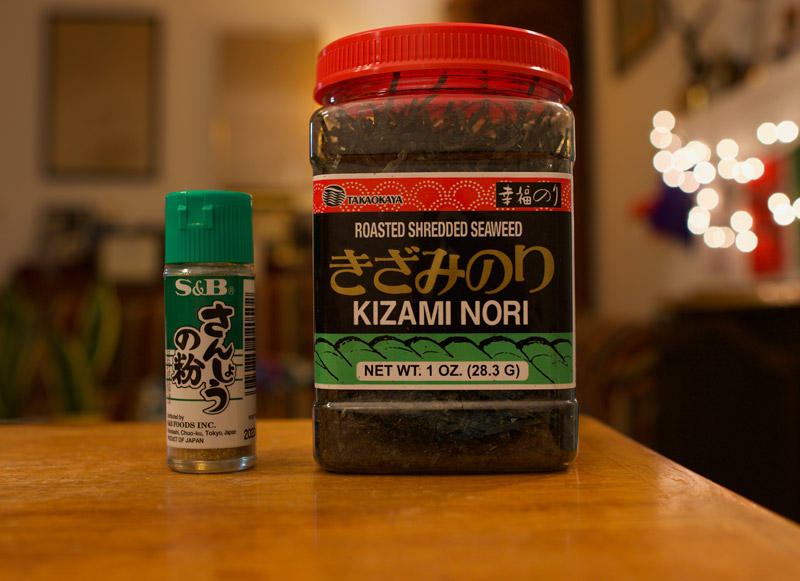
3/4tspsansho (ground Japanese pepper), or to taste
3cupsfirm, hot, freshly cooked Japanese white rice (can also use leftover or even cold rice)
Kizami Nori (seaweed slivers) to taste
Dashi Stock (or use homemade)
2-1/2cupswater
1tspinstant dashi granules
1/8tspsalt
Instructions
Separate the fish slices and place in one layer on a flat dish. Combine the soy sauce and sansho pepper and pour the resulting mixture over the fish. Marinate for 15 minutes, turning once or twice. Meanwhile, prepare the dashi stock by bringing the water, stock granules, and salt in a saucepan to a boil. Cover and keep the stock very hot.
Just before serving, place the rice in four bowls and top generously with the seaweed. Place the fish slices on top of the rice in a sunburst pattern, covering the seaweed. Pour enough hot dashi stock over the rice, fish, and seaweed to nearly cover the fish. Lightly mix the result with your chopsticks and eat immediately. Tsukemono (pickled vegetables) are a nice accompaniment to chazuke.
Notes
Some other common toppings include Japanese pickles, umeboshi, sesame seeds, salted salmon, trefoil, scallions and wasabi.If you decide to use good quality strongly brewed green tea instead of dashi stock, top with a generous dab of wasabi to taste after pouring the piping hot green tea over the rice/fish combo and eat immediately.
Snap a pic and hashtag it #thanksforthemeal — I would love to see a photo of your Chazuke on Instagram and or Facebook, or leave a note in the comments section (see below) and let me know!
Wet-rice culture came to Japan during the dawn of the Yayoi period (300 B.C. – 300 A.D.), either directly from China or via the Korean Peninsula. It was a time characterized by people known as the Yayoi, new tools and farming techniques (such as growing rice in paddies), and a deep reverence for rice itself, typified by seasonal ceremonies and festivities that are observed to the present day.
Contrary to popular belief, however, white rice didn’t become Japan’s primary grain until after World War II.
Until then, grains like millet or barley were the dietary mainstays of most Japanese. Rice farmers didn’t get to enjoy the fruits of their labor very often, either. During the Edo Period (1603-1867), rice was primarily used to pay taxes to samurai landholders; a samurai’s wealth, in fact, was measured by the number of koku (a koku equaled to little over five bushels) of rice he collected. The only people who ate white rice in those days were samurai, the upper classes, and rich merchants, and they were prodigious consumers of the stuff. In 1859, for instance, members of the upper social strata ate an annual average of 228 kilograms of rice. In comparison, in 2017, the average rice consumption rate was around 82.1 kilograms per person.
Rice’s Importance in Japan
Another reflection of the continuing importance of rice in Japanese culture is that the word gohan means not only “cooked rice” but “meal” as well. When somebody says “Gohan desu!” it can be translated as “Soup’s on!” During a typical day in a Japanese household, rice is served in many guises-plain rice accompanying a steaming bowl of miso soup and pickles for breakfast; a box lunch filled mainly with rice and topped with a fat umeboshi (pickled plum); onigiri (rice balls) for a snack; and for dinner, often rice, served in any number of variations.
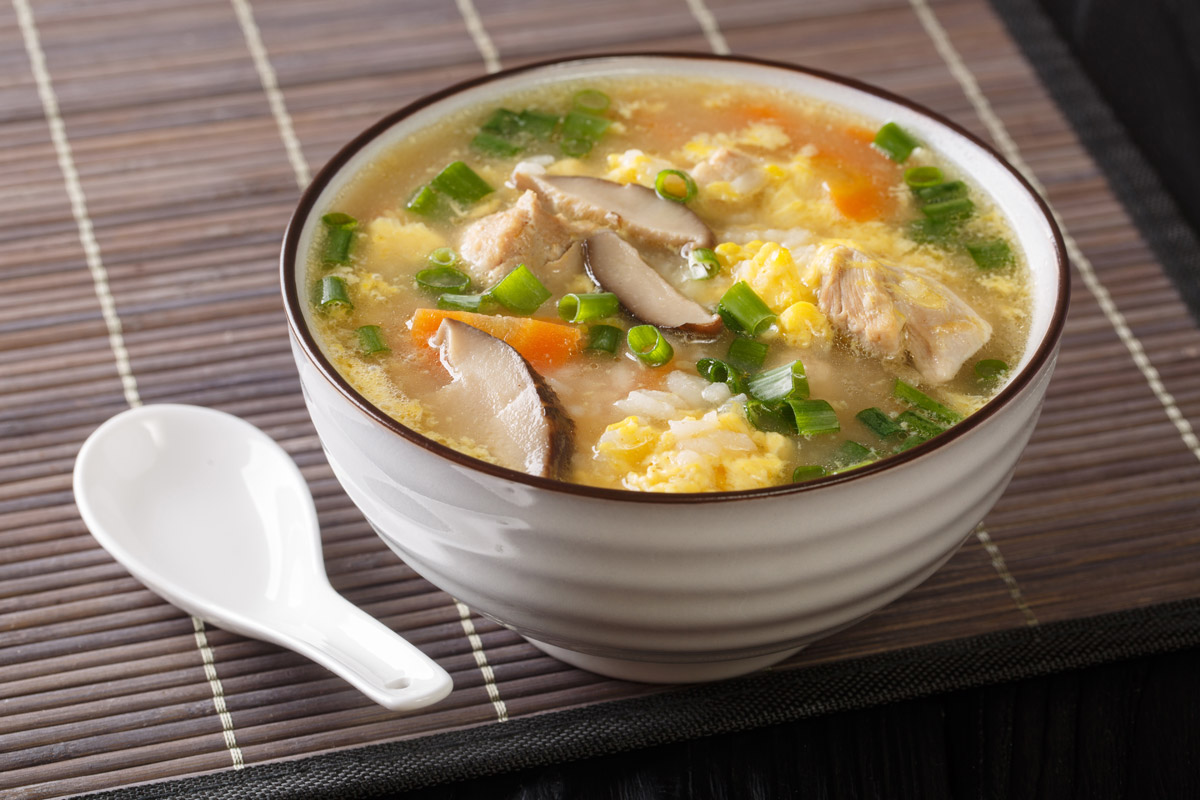
Zosui
Zosui (rice porridge) also known as ojiya is one such excellent way to utilize left-over rice and make it into a meal. Although my recipe uses chicken and vegetables, you could also do a simplified version just using flavored dashi stock of some sort, eggs, and minced green onions or trefoil as a garnish. It is also particularly tasty using left-over reserved soup stock from a nabemono (hot pot) meal such as Oden.
Get FREE Japanese Recipes by Email! Sign Up Now!
Get Lucy’s ebook, “How to Make Traditional Japanese Salad Dressings” FREE when you subscribe.
5-1/4ozsskinned and boned chicken breast (150g), cut into small cubes
1 ¾ ozscarrots (50g), peeled and cut into thin half-moons
2small turnips, peeled and cut in two, then cut into thin half-moons
4-1/2cupsslightly undercooked short-grain Japanese rice (can also use pre-cooked leftover rice or even frozen rice)
2largeeggs, slightly beaten
Garnish
Use either minced green onions (to taste) or mitsuba (trefoil), trimmed and finely chopped with stems, to taste.
Instructions
In a deep pot (ideally an earthenware one you can bring to the table for easy serving), add the stock, sake, soy sauce, and salt. Bring to a boil, mix well, then add the chicken and vegetables and cook over medium heat until halfway done.
Add the rice and cook, stirring occasionally, until the chicken and vegetables are completely cooked. Add the beaten eggs, stir once and turn the heat off. Cover the pot for a minute or two-the egg will still be undercooked and runny at this point-then sprinkle the top with either the green onions or trefoil, mixing it into the porridge if desired.
Serve immediately in soup bowls. A plate of tsukemono (pickles) would provide the perfect accompaniment to this dish.
Snap a pic and hashtag it #thanksforthemeal — I would love to see a photo of your Zosui on Instagram and or Facebook, or leave a note in the comments section (see below) and let me know!
When Japan opened its doors to the outside world at the advent of the Meiji period in 1868, it also opened its doors to the outside world and its kitchens. As all things Western became the rage, a unique (and lasting) food trend emerged. Known as yoshoku, it comprised Western dishes with a Japanese twist, often served with silverware, linen tablecloths, and napkins.
In fact, this type of food began to be popular even while Japan was still officially closed to the West. A number of restaurants specializing in Western dishes can be traced back to the final days of the Edo period (1603-1867), among them Ryorin-ten in Nagasaki which opened in 1863.
Up to the mid-twentieth century, yoshoku was defined by such dishes as omelettes, breaded beef cutlets, crab croquettes, hayashi (hashed beef) rice, and a few classier dishes such as tongue stew.
Yoshoku: Western Food, Japanese Style
Today this type of food is still popular, with a number of famous restaurants in Tokyo continuing to serve a distinctive version of Western, often heavily French-influenced cuisine. More recent additions to the repertoire include tonkatsu (pork cutlet) and potato croquettes. Yoshoku is now so firmly planted in modern Japanese culture that it will most likely evoke sighs of nostalgia when served to someone from Japan.
This recipe appeared originally in my original newsletter entitled “Gochiso-sama,” which of course means Thanks for the Meal. A reader of that newsletter who I met years later, informed me that it was this very recipe that clinched his proposal to his now-wife. I love the power of food!
The Importance of Demi-glace Sauce in Yoshoku Cooking
Demi-glace sauce is essential to the preparation of yoshoku dishes. This classic sauce is based on Espagnole sauce mixed with meat stock, then reduced by cooking for a long time to one-half its original volume. It can days to make. Excellent pre-made versions are available. Madeira (a fortified wine from Portugal) is often added and this recipe specifically calls for a dry Madeira.
Espagnole sauce, if you’re not familiar with it, is a basic brown sauce, based on Auguste Escoffier.
Beef Tongue Stew Recipe
Beef Tongue Stew
1-1/2 lbs Beef (Ox) tongue, skinned and cut into chunks
2-3 tbsps Vegetable oil for sautéing
1 medium onion, peeled and thickly sliced
1 garlic clove, peeled and finely chopped
Salt and freshly ground black pepper, to taste
10-1/2 oz. Demi-glace sauce (homemade or store-bought)*
6 oz. Tomato paste
3/4 cup Dry good-quality red wine
1/2 cup + 2 tablespoons dry Madeira
1 cup Water
1 Bay leaf
1/2 Beef bouillon cube, crushed
Accompanying vegetables
8 shallots, peeled
16 snow peas, trimmed
8 baby carrots, trimmed and peeled
8 baby potatoes, peeled
To garnish:
Fresh Parsley, minced
In a medium saucepan,heat the oil and sauté onion and garlic until lightly browned. Add the tongue and continue to sauté until brown. Season with salt and pepper to taste.
Add all the other ingredients, except for 2 tablespoons of Madeira, and stir well. Cover and turn heat down to low. Simmer for one hour, stirring occasionally, then taste the tongue for desired doneness and continue cooking. The longer this stew simmers,the better it will taste – about three hours is best. Just before serving,reheat, adjust seasonings, and add the remaining Madeira.
To prepare the vegetables, boil or steam them and season to taste. If desired, just before serving, lightly sauté them in a little butter.
To serve, arrange separate mounds of vegetables on one side of a deep plate. Pile the stew (sauce to be served separately) on the other side of the plate and top with a little sauce. Sprinkle with minced parsley and serve immediately.
This stew can be made a day in advance and slowly reheated. Season to taste once again and serve.
Main Course
Japanese
Do you love beef tongue stew?
Snap a pic and hashtag it #thanksforthemeal — I would love to see a photo of your beef tongue stew dish on Instagram and or Facebook, or leave a note in the comments section (see below) and let me know!
Over the last five years, I’ve been blessed to travel, cook, and craft my way around Japan, including taking some two dozen cooking classes in Tokyo and Kamakura focusing on traditional Japanese cuisine with Elizabeth Andoh, Shojin Ryori (Zen vegan temple cuisine), and international. I made it to the remote mountaintop monastery of Koyasan, walked part of ancient pilgrimage route Kumano Kodo, visited Kyoto some four or five additional times, including for the spring lantern festival, attended Hirosaki Cherry Blossom Festival, visited dozens of top Japanese gardens, and published some 40 newspaper and magazine articles, all while working full time.
2020 started off with sparkling lights and festive beverages and attire. For an appetizer, I’d made Sabrina Ghayour’s pom bombe, a ball of spiced goat cheese studded with dozens of pomegranate arils and superbly green pistachios from Iran. Pomegranate champagne cocktails and a homemade Polish cheesecake studded with candied and gilded orange peel promised a sweet start to the new year.
The long goodbye….
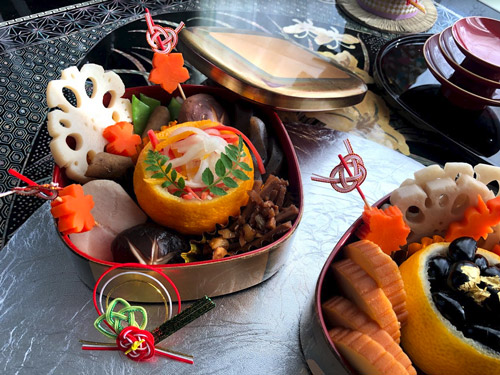
On New Year’s day 2020, knowing it was my last New Year’s Day in Japan, I made all the traditional dishes of Osechi Ryori from scratch: spiced sake, ozoni, kuromame, kohaku namasu, tataki gobo, kombu maki, nishime, datemaki and kuri kinton (check out “The Wonderful World of Osechi: Japanese New Year’s Recipes” book for more traditional recipes and ideas!). Although preparing Osechi is time-consuming and many families now opt to order them from restaurants or department stores, I find making my own to be rewarding and knew it would be my last chance to prepare authentic Osechi with easy access to ingredients. Afterwards, I visited my local shrine for Hatsumode (a visit to shrines and or temples on December 31st to ring one of the 108 bells, and drink sake).
Assorted Osechi dishes
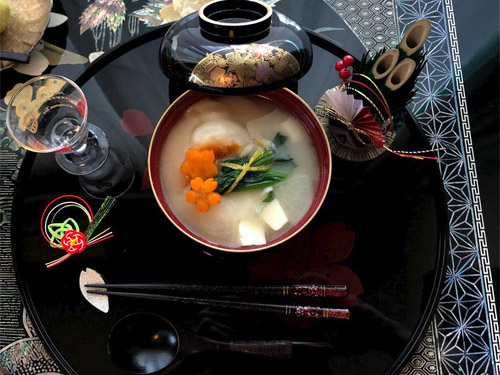
Vegetarian ozoni soup for Osechi
During the early months of 2020, I’d been doing nonstop traveling, photography and writing for JNTO’s Tokyo and Beyond: 2020 Olympics tourism portal. January 4th saw me off to Ryogoku to write up an article on sake, February saw a magical trip to Sawara, and March included a trip to Tokyo to profile traditional Tokyo crafts as well as Kawagoe’s Edo-era charms.
Shortly after, Commander Fleet Activities Yokosuka placed all US Navy personnel stationed in Yokosuka under a three-month Shelter-in-Place order that meant we could leave the house only for medical appointments or grocery shopping, with no retail shopping, museums, malls, onsens or public transportation. Overnight, we were all suddenly teleworking and confined to quarters.
My 40th birthday plans vanished overnight, as did my trip home to celebrate my birthday with family in June and all of my travel plans around Japan (which had included trips to Shodoshima and Tokushima in July and a two-week grand tour of Kyushu culminating in a travel guide in August).
Suddenly I was awash in nothing BUT time as I waited to leave Japan, a precious commodity the previous couple of years as I had managed to fit in traveling, classes, and writing, but no time for cooking and baking. I used my newfound time at home to voraciously cook my way through cookbooks that had been relegated to shelves, starting with Michal Korkosz’s “Fresh from Poland,” where I drew inspiration for my 40th birthday-in-isolation menu as a Polish-American: Sauerkraut and Mushroom-stuffed Pierogi with Candied Orange Peel paired with a French flourless cake baked in my rice cooker as part of a Japan Times article I was working on. I also cooked my way through a number of Michal’s other Polish vegetarian dishes like chilled borscht, tomato apple soup, lazy dumplings, poppyseed roll and fava beans with mint. The flavors and aromas in my kitchen reminded me of cooking with my Polish grandmother in her small Michigan apartment.
I returned to fermenting my own yogurt with rose petal and fig jams rather than purchasing storebought. I went on to cook my way through Sami Tamimi’s Falastin and a number of bread recipes from Polish Housewife and Polish Your Kitchen, including Easter and cheese babkas. My proofing box got a weekly (sometimes daily) workout. I also proofread the first bilingual cookbook from British bakery Mornington Crescent in Tokyo. The once-familiar rhythms of kneading, shaping, proofing and baking were comforting, and I was able to share my baked goods with coworkers once we were allowed to return to work in late June.
As summer crept into fall, we finally got our students back in face-to-face classes. I was able to take one last grand voyage to Matsue, which I’d been wanting to visit for the past several years. It was my last chance to say farewell to the places and the country I loved; I was at Izumo Taisha on the first day of Kamiarizuki, when all the Shinto gods from across Japan congregate at the shrine. Instead of asking for favors, I went to say “thank you” for the many blessings I’d received over the last five years.
With only a few weeks left in Japan, I’m now beginning the process of cataloging my belongings and preparing for an international move, trying to anticipate what Japanese housewares and kitchen items I’ll need in my new life overseas. No matter where I may end up, Japan will always be home in my heart.
For my first Christmas with my family in six years, we’ll be having traditional Polish dishes like pierogi, sauerkraut with split peas and Polish cheesecake, so in a fitting way, 2020 has come full circle.
Pierogi with Sauerkraut, Mushrooms, and Candied Orange Zest
(Recipe adapted from Fresh from Poland: New Vegetarian Cooking from the Old Country by Michal Korkosz)
Makes about 40 pierogi
4 servings
Prep time: 30 minutes
Cook time: 1 hour
Ingredients:
1 pound (450 grams) sauerkraut, drained and finely chopped
¼ cup plus 3 tablespoons (105 g) unsalted butter
1 medium onion (180 g), peeled and chopped
2 bay leaves
1 pound oyster mushrooms, chopped (Note: You can also use 4 ounces / 115 g dried mushrooms, cooked for 40 minutes, instead of the oyster mushrooms)
1 small carrot (100 g), peeled and grated
5 tablespoons chopped candied orange zest
1 whole star anise pod
2 whole cloves
Salt and freshly ground black pepper
Basic Pierogi Dough:
3 ½ cups (450 grams) all-purpose flour
1 teaspoon salt
¼ cup cold-pressed rapeseed oil or extra virgin olive oil
1 cup warm water
To make the filling, place the sauerkraut in a medium saucepan and cover with water. Cook over low heat for 40 minutes until tender. Drain well.
Heat 1 tablespoon of the butter in a large skillet. Add the onion and the bay leaves. Cook, stirring occasionally, until the onion is translucent, about 3 to 4 minutes. Add another tablespoon of butter, let it melt, then add the mushrooms. Cook for 5 to 8 minutes, until golden brown. Add another tablespoon of butter, let it melt, then add in the mushrooms. Cook for 5 to 8 minutes, until golden brown. Add another tablespoon of butter, then the sauerkraut, carrot, and 2 tablespoons of the candied orange zest. Cook for 2 minutes more, until the flavors combine. Discard the bay leaves, then season with salt and pepper. Let cool completely.
Meanwhile, make the pierogi dough. Combine all-purpose flour and salt in a large bowl. In a separate bowl, combine rapeseed oil or extra virgin olive oil and warm water. Slowly add the liquid ingredients to the flour and mix with a wooden spoon until the dough is well combined. Turn the dough out onto a clean, lightly floured surface and knead for 4 to 5 minutes, until it is smooth and supple. Invert a bowl over the dough and let it rest and room temperature for at least 15 minutes to allow the gluten to relax.
Divide the dough into three equal pieces. Place one piece on a lightly floured surface (Cover the remaining dough with a kitchen towel to keep it from drying out). Using a rolling pin, roll out the dough to a thickness of just less than 1/8 inch (3 mm), lifting up the dough to dust the surface with flour to prevent sticking if needed.
Using a pastry cutter or inverted glass tumbler, cut out 2 ½ inch (6.4 cm) diameter circles of dough. Roll out the circles even thinner, to 3 inches. Gather the dough scraps into a ball and set aside. Continue with the other two pieces of dough, and the combined scraps, until all dough is used, making 40 circles.
Put 1 to 2 tablespoons filling in the center of each round, leaving a 2 cm border. Grasp the dough from opposite ends and pull it up over the filling, pressing down to seal the edges together and creating a semicircle. Pinch the edges together to seal completely (if the edges don’t adhere, brush them lightly with water, then seal). Transfer the pierogi to a lightly floured kitchen towel and cover with another towel to prevent drying.
Boil a large pot of salted water. Working in batches, use a slotted spoon to gently lower 10 to 16 pierogi at a time into the pot. When the pierogi rise to the surface, continue to cook them for 1 to 2 minutes more, then transfer with the spoon to a colander to drain immediately.
(My Polish grandmother always finished off her pierogi by draining and then pan-frying in butter until crisp and golden brown, which is how I serve them as well.)
To make the topping, heat the remaining 4 tablespoons butter, 3 tablespoons candied orange zest, and the star anise and cloves in a small saucepan. Remove from heat to let the flavors develop.
To serve, divide the pierogi among plates and spoon a generous amount of the topping over them.
Note: Uncooked pierogi can be stored for up to 2 months. Boil them straight from the freezer, adding minutes to the overall cooking time.
Sarah B. Hodge has over a decade of experience in cookbook reviewing as well as cookbook proofreading and recipe testing. A freelance writer for publications including The Japan Times, Tokyo Weekender and Stars and Stripes Japan, she has taken over 100 cooking classes around the world and is a voracious cookbook collector. All photographs by Sarah B. Hodge.
I have been thinking a lot about end of the year culinary rituals and traditions while writing this blog posting. I keep pondering why when I first experienced Osechi as a young bride (literally only married for 2 weeks) in Tokyo all those years ago, it so captivated me to this day? In a way, it was a culinary bridge to getting to know my new Japanese family through the endless hours of preparing Osechi with my new mother-in-law and sisters-in-law. I love Osechi as a our special year-end ritual and annual tradition. I love to celebrate it as a seasonal festive Japanese event.
A New Year’s Salad: Kohaku Namasu Recipe
My osechi of today is stream-lined and simplified, but no less significant to my daughter and me, and still filled with osechi classics that we love. I bring out the special over-sized ozoni soup bowls, and jubako that I have, and we will pick out new and special chopsticks to use during our celebration. I have been saving some from our last trip to Japan for just this occasion.
I have decided we will do our end of the year shopping on December 29th. What will we find or not? That, of course, is the big question. I know food shipments from Japan have been delayed a lot due to COVID. So, although we will have a big shopping list for December 31st-January 3rd meals, we will make adjustments if needed, and go early and follow best COVID practices. I am pondering which nabemono to enjoy as well over the holidays as it is fun to cook at the table. So many choices!
On December 31st, I will prepare Tokyo-style Toshikoshi Soba. She adores this Hokkaido-style Ozoni with salmon, so I think we will enjoy this one on January 1st. Of course, fresh mochi will be enjoyed in many different guises, as well as lots of green tea, including our beloved matcha, and every year I add in something different or new for her to try. I love salads, and this is one of my favorites for the New Year.
For more than a decade, many Japanese have bought Osechi in department stores. Time has passed and things have changed a lot. Recently Osechi from Japanese restaurants and Sushi shops have also become popular. Even Chinese restaurants and French restaurants prepare Osechi to be ordered in advance. Theirs are not like a traditional Japanese Osechi, but people find them tasty and different. Most likely the younger generation who live independently and who do not visit their parents during Oshogatsu will not bother to eat Osechi. Which is a pity in my opinion. Making Osechi isn’t particularly difficult, just takes some planning and time.
Namasu: Vinegared Foods
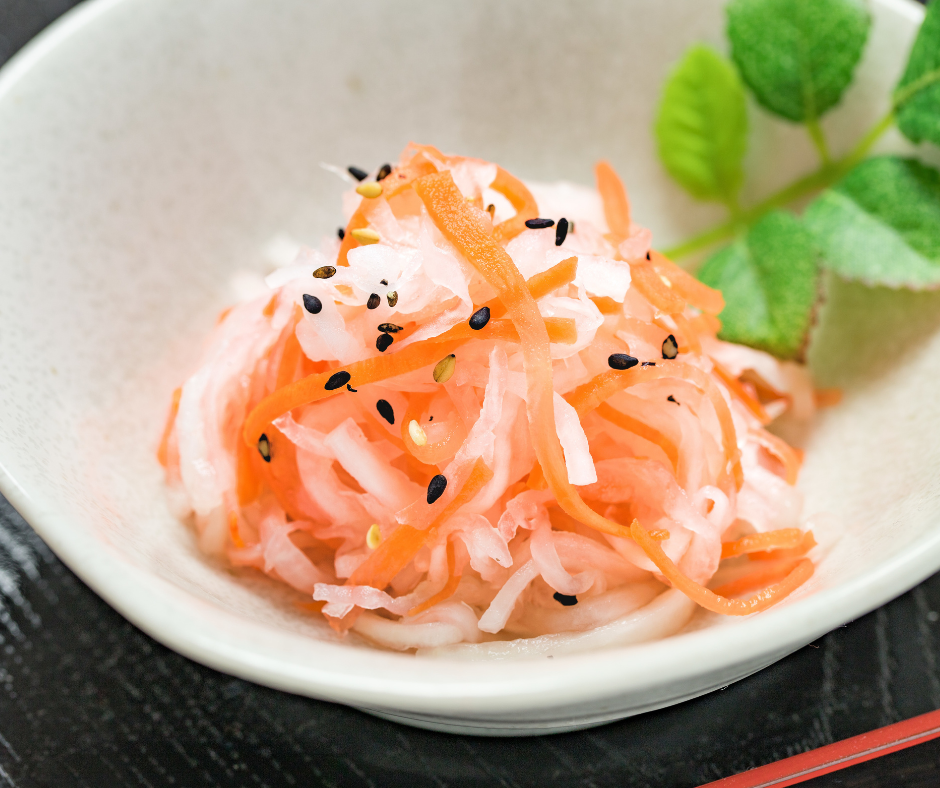
Namasu is the old term for any type of vinegared food, or Japanese salad. Some are made only with vegetables and others include fish. Kohaku (meaning red and white–typically associated colors of happiness and celebration in Japan) Namasu is a traditional standard for New Year’s (Osechi) celebrations; it combines daikon and carrots. There are really red carrots that sell around the Oshogatsu season. It is really red, not orange like ordinary carrots. These red ones are strong, so you do not need to put in a lot.
The red and white color combination is deeply rooted in Japanese culture. When we see red and white, we recognize it automatically as something auspicious. Weddings, inauguration ceremonies, the first day of education in schools, or the beginning of a joint venture, town festivals etc., are just some of the many events that red and white are used in celebration. Envelopes with red and white strings to celebrate somebody, too, is often used.
Kohaku Namasu salad is so easy to make and of course, can be enjoyed year-round if desired.
Combine daikon radish and carrot and knead lightly with salt. Let drain in a colander for 15 minutes. Rinse in water and squeeze out excess water.
Combine with dressing and taste for seasoning. If you prefer a sweeter version, cut down on the vinegar and increase the sugar. When ready to serve, drain off most of the dressing. It can be garnished with slivers of fragrant yuzu and or lemon peel, toasted white sesame seeds and served in hollowed out yuzu or lemon halves. This salad actually tastes better after ripening in the refrigerator (in a closed container) for a day or two.
Notes
The carrot can be replaced with peeled fresh persimmon strips and or dried apricot strips as a variation.You can also use yuzu juice (or lemon juice) with vinegar, which gives it a slightly different and refreshing flavor as another variation.In Japan, there is Hoshigaki dried persimmon, so you can use dried persimmon strips, too. However dried persimmon is sweet, so cut down on the sugar when using.
Snap a pic and hashtag it #thanksforthemeal — I would love to see a photo of your Kohaku Namasu salad on Instagram and or Facebook, or leave a note in the comments section (see below) and let me know!
Green tea has a tremendous amount of health benefits – the EGCG compounds in the drink have been known to be anti-cancer, anti-inflammatory, and good for your blood sugar and weight loss. It’s also delicious, and with a fraction of the caffeine as coffee, it’s a great choice for health-minded people who love the crisp, light, refreshing taste.
But forget all of that, because we’re going to make ice cream with it. Now admittedly, it’s going to be keto ice cream, so it will be worlds healthier than traditional recipes, but still – ice cream, yum.
The good news is that it’s incredibly easy to make and there’s nothing truly crazy or exotic in the recipe. Japanese keto recipes are easier than you might think! A little mixing, a ready ice cream maker, and you can throw this keto matcha ice cream together in about half an hour.
Green tea ice cream
While it’s not exceedingly common in US households, matcha ice cream is a staple in Japan. It’s light and refreshing, but still sweet and satisfying. Additionally, as I spoke about before, there are a lot of additional health benefits to green tea that are concentrated in the powdered matcha form. Teabags are fine for drinking, but for this, you’ll need culinary-grade matcha powder. Check out one of my favorites from MatchaSource!
Thankfully, it’s become increasingly easy to find. If you’re lucky enough to have an Asian market in your town, they’ll definitely have it, but many grocery stores – including Walmart – carry it now. Typically it comes in tins but there are also pouches, and you don’t need to get organic or anything – regular matcha powder works just fine.
Though on its surface, matcha is a green tea, it’s not made by steeping leaves the way that you might normally find green teas. Instead, you whisk the powder into boiling water, creating a frothy, smooth, delicious drink that pops with fresh, living flavor.
This ice cream embodies that freshness, creating a wonderfully sweet yet refreshing dessert that won’t throw you out of ketosis.
Keto Matcha Ice Cream
Making keto matcha ice cream with an ice cream maker is incredibly simple, and can be put together in a matter of minutes. You’ll want to make sure your ice cream maker bowl is frozen for at least 24 hours before proceeding.
Ingredients:
2 cups of heavy cream
1-2 shots of sake or vodka (this isn’t necessary but it will decrease the iciness of the finished ice cream)
1/4 tsp xanthan gum (this is also not necessary but will make the end product creamier and again, less icy)
1/3 cup Swerve, Truvia, or another sugar-free sweetener
2 tbsp matcha powder
Using a whisk or hand mixer, blend everything together until it’s well incorporated and pour into running ice cream maker. Churn for 15 minutes – it will get to the consistency of soft serve.
At this point, it’s perfect to eat right now. The texture will be a lot like custard; very creamy and smooth. Save whatever is left in an airtight container with a layer of wax paper on top and eat within a week for best taste and consistency.
Don’t be afraid of making your own ice cream
Many people who use ketosis as a means to lose weight miss getting ice cream with their family, because either they don’t have an ice cream maker or they simply feel it’s too daunting. You can make this without an ice cream maker – just mix it as normal, put it into a container, and let it freeze. It won’t have the exact same consistency, but it will still taste delicious and scratch that itch for cold, sweet refreshment.
If you’re on the fence because making ice cream seems just a little too extra, don’t let the process scare you off. Making keto ice cream – or ice cream in general – is extremely simple and once you’ve done it the first time, throwing a batch together will be second-nature. Keto doesn’t have to be bacon and eggs all the time; there are so many ways to enjoy healthier, low carb versions of your favorite foods without buying them premade at the store with a ridiculous markup.
Homemade keto matcha ice cream destroys any $7 pint of store-bought ice cream in both flavor and texture. I highly recommend this recipe, not only for the fresh matcha kick it offers, but also as a base for any other keto ice cream you want to try. Simply swap out the matcha powder for 2-3 tablespoons of your favorite extract.
If you’ve given this recipe a whirl, let me know in the comments what you thought of it. Enjoy!
About the Author: Tony Lozzi is a freelance writer and father of two who enjoys finding ways to turn his favorite carby foods into keto recipes.
Get FREE Japanese Recipes by Email! Sign Up Now!
Get Lucy’s ebook, “How to Make Traditional Japanese Salad Dressings” FREE when you subscribe.