Category: Rice

  • Onigiri – Rice Balls Recipe

    Onigiri – Rice Balls Recipe


    Onigiri (rice balls) also called omusubi is Japan’s brilliant, versatile and endlessly creative answer to savory sandwiches. It is completely portable and you can take onigiri to school excursions, exams, picnics…well just about anywhere. For an added treat, you can grill the onigiri, wrap in nori (seaweed) if desired and serve hot. Typical shapes of rice balls are triangles, rounds or ovals. Oh yes, wrapping your onigiri in seaweed prevents sticky fingers, a real plus for a meal on the go!

    There are many Onigiri specialty shops in Japan and if you go to any konbini (convenience store like Lawson’s, or 7-11), you will find a wide assortment to choose from. But, they are so easy to make, do try making it at home. They are quick to make as long as you have some cooked rice, and you can let your imagination for fillings run wild! Here are just a few popular combos to try.

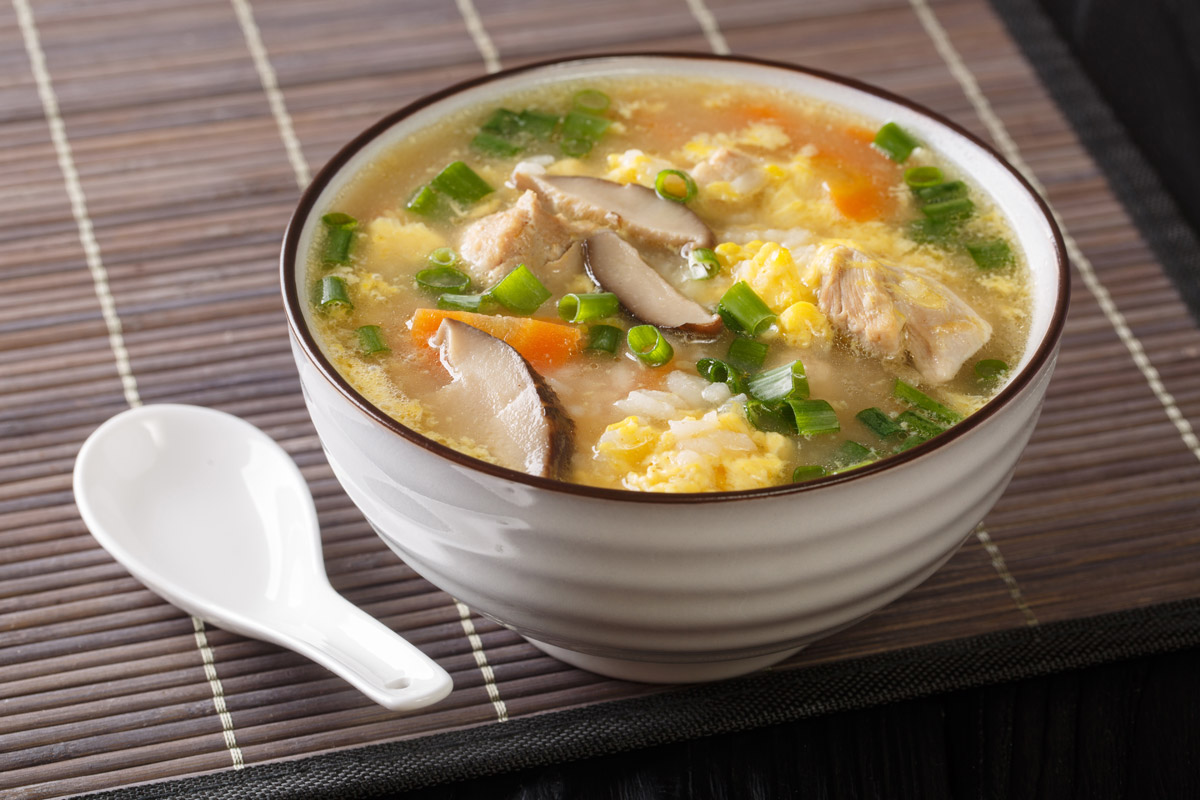
    The best accompaniment to onigiri to my mind if time permits is pickled vegetables (tsukemono) and a bowl of miso soup if you want a bigger meal. Onigiri can also be served instead of a bowl of white rice at any informal meal.

    My dear friend, Naomi in Tokyo, put it this way: “Onigiri is soul food for Japanese people. It conveys Mother’s Love.”

    What’s your favorite onigiri? It’s hard for me to pick just one…..But, I do make grilled Okaka (dried bonito flakes, toasted white sesame seeds, and soy sauce) a lot at home. The real issue is stopping eating them as they are so delicious! Consume your onigiri the day you make it and don’t refrigerate. That would make the rice hard and very untasty!

    Onigiri (Rice Balls)

    Lucy Seligman
    No ratings yet
    Course Side Dish
    Cuisine Japanese
    Servings 4

    Ingredients
      

    • 3 cups cooked & warm Japanese short-grain rice
    • Dried nori (seaweed) sheets as needed, lightly toasted, optional

    Fillings: Choose one or do a variety: This recipe makes 8-10 rice balls.

    • 2 to 3 small packets of dried bonito flakes, 3 to 4 tablespoons toasted white sesame seeds, and soy sauce to taste
    • Umeboshi (pickled plums), pitted
    • Salted grilled salmon, deboned & flaked, homemade or store bought

    Instructions
     

    • If making the first filling called Okaka: Combine the warm rice and seasonings in a bowl. Mix lightly to blend, and adjust seasonings as desired. Moisten your hands with lightly salted water, or use an onigiri mold (usually made of plastic), also dipped into water, and shape into triangles. Press the rice into shape, but don’t mash or squash the onigiri. You can also use plastic wrap to shape the onigiri and to transport in the wrap until ready to eat.
       
    • If making any of the other fillings: Make a small hole in the center of the onigiri, and tuck in a little of one of the fillings (about 1-2 teaspoons). Continue shaping onigiri to cover the fillings. If desired, wrap the onigiri in the toasted seaweed, or cut the seaweed into the same shape as the onigiri, and place on top.

    Notes

    You can also mix in any kind of Furikake (flavored dry condiment such as Wakame Furikake, Shiso Furikake, etc) into the rice for an added layer of flavor.
    Other popular variations include:
    Tarako (salted cod roe), either raw or grilled,  Mentaiko (roe made from Alaskan pollock/cod) for a spicy kick, tempura shrimp, tuna mayo (make sure you use Japanese mayo for added flavor), and on and on.
    Keyword rice
    Tried this recipe?Let us know how it was!

    Onigiri Rice triangle with nori seaweed on white plate

  • Unusual Edo Tastes: The use of Black Pepper and Garlic

    Unusual Edo Tastes: The use of Black Pepper and Garlic

    Japan may have been cut off from the rest of civilization during the Edo period (1603-1867), they sure didn’t suffer when it came to food and  had a surprisingly rich food culture. They had a vast and plentiful diet, that included many western imports. Over 300 cookbooks were written during the Edo Era. The following recipes, which are adaptations from Kyoikusha-shinsho’s fabulous Ryori no koten series, employ and highlight two fairly unusual ingredients for Japanese dishes of that era: black pepper and garlic.

    Unusual Edo Tastes

    There is an interesting story behind the black pepper. In 1609, a government official at the port of Hirado, southwest Japan, bought a large quantity of pepper from the Dutch. The Dutch were the only Westerners allowed to remain in the country after the Tokugawa government sealed Japan off from outside influence. Although pepper was a luxury item in those days, perhaps the official entertained the idea of promoting good ties or having a better import-export relationship with Holland. At any rate, this purchase might have been what led to the increasing availability and popularity of pepper during the Edo period.

    These recipes originally caught my eye because I love all types of pepper and garlic!

    I had some left-over black pepper rice, and fried it in a little oil the next day so that it was browned and crispy. Delicious! Whether you are on team rice cooker (my daughter), or team stove-top (me), this rice dish will come out perfectly either way.

    BLACK PEPPER RICE

    black pepper rice

    Serves 4-6

    • 2 cups Japanese white rice, washed and drained
    • ½ teaspoon fresh black peppercorns, coarsely cracked
    • 2 tablespoons soy sauce
    • 1 tablespoon sake (rice wine)
    • 1 piece of konbu (kelp), 2 in by 2 in, wiped lightly with a damp cloth

    Garnish:

    • Shredded nori (seaweed)

    Soak rice in water for up to 30 minutes before cooking. Rinse and drain. Mix the rice, black pepper, soy sauce, and sake in an electric rice cooker or large saucepan. Place the konbu on top and add enough water to cook the rice. Follow instructions if using an electric rice cooker, otherwise cook covered for 20 minutes or until the water is absorbed. Turn heat off. Let cooked rice rest for 10 minutes with cover on. Discard konbu. Serve in rice bowls, top generously with shredded nori, and eat immediately.

    SHREDDED CHICKEN WITH JAPANESE RADISH

    shredded chicken japanese radish

    Serves 4-6

    • 1 lb daikon (Japanese radish), peeled and cut into thick rounds
    • ¾ lb boneless chicken breast with the skin, cut into chunks
    • 3 tablespoons soy sauce
    • 1 tablespoon sake
    • Pinch of salt
    • 1-½ tablespoons cornstarch

    Garnishes:

    • 1-2 cloves garlic, peeled and thinly sliced, or to taste
    • ½ cup green onions, finely chopped

    Place the cut daikon in a soup pot and lay the chicken on top. Cover with water. Bring to the boil, remove scum if necessary and cook, covered, for 10 minutes. Turn off the heat, take out the chicken, and discard the skin. Cool chicken briefly and shred it.

    Add soy sauce to the soup pot and cook for a further 10-15 minutes with the lid off, or until softened. Take out the daikon and place in 4 or 6 serving bowls. To finish the sauce, turn heat down to low and add in the sake and salt. Combine the cornstarch with a little cold water to make a smooth paste and add to sauce to thicken it slightly, stirring until combined. Taste for seasoning and adjust if necessary.

    Place the shredded chicken into the prepared sauce for a few minutes to reheat and then remove. Place the chicken on top of the daikon, pour a little sauce over it, and sprinkle with the garlic and green onions. Serve immediately.

  • Inarizushi – Sushi Rice in Pouches of Deep-fried Tofu

    Inarizushi – Sushi Rice in Pouches of Deep-fried Tofu


    Auspicious foods are a classic feature of Japanese festivals. At Hinamatsuri, also known as Girls’ Day Festival, on March 3, tradition dictates fare such as shirozake (white sake), arare (cubed rice crackers), and inarizushi (sushi rice in pouches of deep-fried tofu).

    The Fox’s Favorite – A POCKETFUL OF RICE

    The word inari originally meant a farmers’ god, bringer of good harvests. His messenger was a fox, so the entrance to an inari shrine, often reached through a series of red torii gates, is guarded on both sides by stone foxes. Offerings at the shrine have traditionally included sake, mochi (rice cakes) and sekihan (red rice). And, from the end of the Edo period (1603-1867), abura-age (deep-fried tofu) began to also be left for the fox messengers. One suggestion is that foxes acquired a taste for oily foods because when hungry they used to sneak into shrines and lick the oil from lanterns for sustenance. Whatever the reason, it’s generally believed that abura-age is their favorite snack. So sushi made with abura-age came to be called “inari” sushi.

    Inari Sushi – Inarizushi

    Inarizushi first appeared during the early days of the Tempo era (1830-44), a period of great famine. According to one story, it was introduced in the Ryogoku-bashi area of Edo (Tokyo) by a sushi shop employee called Jirokichi. At night he ran his own food stall, where he sold inarizushi dirt-cheap. He could only sell it after dark, however, because the people of Edo were so snobbish that they didn’t want to be seen consuming such cheap eats. Nonetheless, by 1846 inarizushi had become popular enough even to have its own vending cry.

    Now it is readily available throughout Japan, with regional differences in the shape. The fried tofu skins may be triangles, or squares, or even turned inside-out. Sometimes they are tied up into little pouches with a length of edible dried gourd. The name varies, too – in Osaka, for example, it is called kitsune-zushi (fox sushi) or simply kitsune.

    Inarizushi recipe

    It took me a long time to like Inarizushi and I finally figured out that it was because most of what you buy can be cloyingly sweet. Once I started to make my own, lessen the sugar, and added in more sesame seeds, I became a fan. One variation I have begun doing is adding slivers of peeled Japanese cucumber to the sushi rice mixture. I like the contrast of textures, and the added crunch from the cucumbers. Perfect picnic food!

    Sushi rice in pouches of deep fried tofu

    Inarizushi

    Lucy Seligman
    No ratings yet
    Course Side Dish
    Cuisine Japanese
    Servings 4

    Ingredients
      

    • 2 cups Japanese short-grain white rice, washed and drained
    • 3 tbsp sake
    • A 3-inch (7.5-cm.) square of dried konbu (kelp), wiped with a damp cloth and slashed to release favor
    • 4 tbsp rice vinegar
    • 3 tbsp white sugar (up to 4 tablespoons for a sweeter rice)
    • 1 tsp salt
    • 2 tbsp toasted white sesame seeds, or more to taste
    • 6 sheets abura-age (fried tofu)

     Seasoning stock:

    • 1-1/2 cups dashi fish stock
    • 3 tbsp soy sauce
    • 3 tbsp white sugar
    • 2 tbsp sake
    • 1 tbsp mirin (sweet sake)
    • 1/4 tsp salt

    Instructions
     

    • Put the washed rice in an electric rice cooker or large saucepan, add the sake and slightly less water than usual (the aim is firm rice, not mushy), top with the kelp, and cook. Meanwhile, slowly heat the vinegar, sugar, and salt, stirring continuously, in another pan. When the sugar is dissolved, remove from heat and let cool to room temperature.
    • As soon as the rice is ready, spread it on a large platter and cool quickly using a paper fan. Discard the kelp. Drizzle the cooled vinegar mixture over the rice and mix lightly with a rice paddle – trying not to mash the rice. Sprinkle in the sesame seeds and mix lightly. Leave to cool, covered with a damp piece of cheesecloth, until ready to use.
    • Place the abura-age in a colander and pour boiling water over it to remove the oil, and soften the abura-age. Gently pat dry with paper towels and slice in half (across the middle, to preserve two pouch-like ends). Carefully open the pouches with your fingers, trying not to tear them.
    • In a medium-sized saucepan, heat all the ingredients for the seasoning stock. Add the abura-age and bring to a boil. Turn the heat down and simmer, semi-covered, for 20 minutes. Remove from heat, leaving the abura-age in the sauce to absorb the flavor until it cools to room temperature.
    • Drain the abura-age, discarding the stock. Wet your hands with water and scoop up some of the sushi rice into a small ball, shaping firmly to fit one of the pouches. Stuff the pouches and place on a serving plate, seam side down.

    Notes

    This recipe makes 3 pouches person. Best consumed the same day of preparation.
    Variation: Add slivers of peeled Japanese cucumber to the sushi rice mixture.
    Tried this recipe?Let us know how it was!


  • Japanese Curry Rice Recipe

    As much a part of the national food culture as sushi, various types of curry served with white rice (Kare Raisu, カレーライス) has been an enduring favorite in Japan since the Meiji era (1868-1912). Known as “curry rice” or “rice curry”, these days they usually contain meat or poultry, potatoes, carrots, and onions. Unlike Indian curries, however, for which the spice mixture is created fresh each time, the Japanese dish uses curry powder (such as S & B Oriental Curry Powder) – which came from Britain and was first sold in Japan in 1930 – with flour as a thickener.

    Japanese Curry Rice

    Curry Rice: The Ideal Meal?

    It is a big family favorite here (my daughter often replaces the chicken with firm tofu and even adds in fresh shiitake mushrooms sometimes) and a great addition to your culinary repertoire. Fast, easy, savory, and delicious…what more do you want in a weekday meal?! Be warned: Japanese curry can be thicker than you may be used to and not ultra-spicy (unless you use one of the ready-made ‘hot’ curry roux packs) but it has a very alluring flavor and my biggest suggestion is to make double the amount to have some extra in the freezer or for another meal!

    The earliest curry recipes are found in two cookery books published in 1872. Seiyo Ryori Shinan (A Guide to Western Cooking), written by the owner of a bookstore called Keigakudo, featured a recipe for frog curry quite unlike any curry eaten in Japan today. As well as frog meat, it included leeks, shrimp, garlic, ginger, butter, salt, flour, and curry powder, and was boiled for one hour. One can only wonder about the taste! Later in the same year, the first chicken curry recipe appeared in Seiyo Ryori Tsu (The Western Cooking Expert) by the noted journalist, Robun Kanagaki.

    The Origin of Curry Rice

    Curry rice’s real popularity can be traced back to the Japanese military, which began serving it at the end of the Meiji era and the beginning of the Taisho era (1912-26). It was considered the ideal meal, using only one bowl yet incorporating rice, vegetables, and meat. It also became popular in rural areas during harvest time, being easy to make, substantial, and cheap. Nowadays, a whole range of instant curry roux (with varying levels of spiciness) is part of Japanese life, and curry remains a perennial favorite for take-out, restaurants, and for the home cook.

    If you make this recipe and love it, please come back and give it a 5-star rating ⭐⭐⭐⭐⭐ It helps others find the recipe! ❤️ Above all, I love to hear from you. Then snap a photo and tag me on Instagram! I would love to see your creation.

    Japanese chicken curry recipe

    Japanese Curry Rice Recipe

    Lucy Seligman
    5 from 1 vote
    Course Main Course
    Cuisine Japanese
    Servings 4

    Ingredients
      

    • 3 tbsp neutral oil
    • 3 tbsp unsalted butter
    • 2 large cloves garlic, peeled and grated
    • 1/2 tbsp fresh ginger, peeled and grated
    • 2 medium onions, peeled and thinly sliced
    • 4 tbsp Japanese curry powder (such as Oriental S & B Curry powder), or to taste
    • 4 tbsp white flour
    • 5-1/2 cups unsalted chicken stock
    • 1 small red apple, peeled and finely grated (grate just before using to prevent discoloration)–I used Fuji
    • 2 bay leaves
    • 1 tbsp tomato ketchup
    • Salt and black pepper to taste
    • 1.5 lbs skinless, deboned chicken thighs or breast, cut into large bite-sized pieces
    • 3 medium potatoes, peeled and cut into large bite-sized pieces
    • 2 carrots, peeled and cut into large bite-sized pieces
    • 1 large onion, peeled and cut into eighths (wedges)
    • 1 tbsp soy sauce, or to taste
    • Cooked & hot Japanese white rice

    Optional Garnishes:

    • Rakkyo pickles ( a type of Japanese shallot)
    • Kizami pickled ginger
    • Fukujinzuke relish

    Instructions
     

    • In a deep frying pan, heat 2 tablespoons of oil and 2 tablespoons of butter. Sauté the garlic and ginger briefly, then add in the sliced onions and sauté over medium heat, stirring, until brown – about 20 minutes. (Note: Caramelizing the onions adds another layer of flavor and depth to your curry.)
       
    • Next add in 2 tablespoons of curry powder, sauté briefly, then add the flour and sauté for a few minutes more, stirring constantly, until well combined. Little by little, add in the chicken stock, stirring continuously, to make a thick roux, and bring to a boil. Add in the grated apple, bay leaves, and ketchup, and simmer for 15-20 minutes, or until the sauce thickens. Remove any scum.
       
    • Meanwhile, salt and pepper the chicken. In another pan, heat the remaining oil and butter, and sauté the chicken until it becomes brown on both sides.
    • When the sauce is ready, remove the bay leaves, add in the chicken, vegetables, salt, and pepper to taste, 2 more tablespoons of curry powder (or more if you want), and the soy sauce. Cook, covered, over medium heat for 25 minutes, stirring occasionally. Meanwhile, cook or reheat the rice. Adjust the curry seasoning to taste and serve hot over rice. Pass the garnishes separately.

    Notes

    It is a matter of personal preference how thick you like the roux. In Japan, it can be anywhere from very thin and watery to very thick, especially if you decide to use ready-made roux. This recipe is in the medium thickness range. Play with it and see what variation you like. It is a very forgiving recipe!
    Keyword chicken
    Tried this recipe?Let us know how it was!

    Get FREE Japanese Recipes by Email! Sign Up Now!

    Japanese salad dressing recipes
    .
  • Tai Chazuke

    Tai Chazuke

    Keeping with our theme of quick, versatile, and easy to eat and make rice dishes (like Zosui), here is another traditional favorite of mine, chazuke.  I like to make it when I am in a hurry to get dinner on the table and also when I have left-over rice.

    What is Tai Chazuke?

    Simply put, chazuke is either hot or cold cooked rice, topped with a variety of ingredients and then immersed in either hot strong green tea or dashi stock. We have samurai warriors and Buddhist priests to thank for chazuke, a venerable Japanese fast food that remains popular to this day.

    This particular recipe uses tai (sea bream) and dashi stock, but of course, there are endless variations. If we use green tea instead of stock, then it would be called Taicha, which is quite popular at the moment. Cha meaning tea and zuke meaning to submerge. Most likely this dish originated in Kyushu, which is famous for its sea bream.

    Chazuke remains a popular craze, with a variety of instant, dried and inexpensive toppings (furikake), such as the well-known Nagatanien brand used. There are even gift sets of more sophisticated and pricier chazuke flavors available.

    The practice of mixing rice with a liquid began in earnest back in the Heian era (794-1185), when aristocrats poured hot water over cold rice in the winter and cold water over the rice in the summertime. This was thought to disguise the taste of rice that was occasionally poor in quality.

    Fast Food From The Past

    By the Muromachi era (1333-1568), the standard breakfast for samurai was rice, miso soup, and pickles. During the civil wars that raged in the latter half of this era, samurai were asked to be frugal as an example to the populace, so they often poured their soup over their rice to create a single dish. This was known as nekomeshi, or “cat’s meal,” because pouring soup on rice for cats is to soften the rice to make it easier for them to eat. Since it was filling and quick to make, this dish became a samurai staple.

    The forerunner of modern Ochazuke

    Hoban or hohan, the forerunner of modern chazuke, was also being eaten by Buddhist priests during the same period, and soon found its way onto the menus of high society. It was served to guests during the tea ceremony, which also developed during this time. The principle was the same: cooked or flavored ingredients (such as vegetables already cooked) were placed on top of rice, and then covered with either green tea or weak dashi stock. It was beautiful to look at and easy to prepare – a perfect offering for unexpected guests.

    By the middle of the Edo era (1603-1867), a greater variety of colorful, flavorful toppings were in use, spurred on by the influence of kaiseki (Japanese haute cuisine) and newly sophisticated tastes. It didn’t matter if the rice was hot or cold, but the tea or stock had to be really hot, since it helped cook any raw toppings such as fish.

    Regional Variations of Ochazuke

    Regional versions of chazuke can also be sampled around Japan. On Shikoku Island, the local version is called bokkake. Bokkake’s main ingredient varies from place to place – rabbit and mackerel are two that come to mind. The main ingredient is cooked together with lots of different vegetables, almost like a stew, and then everything is laid over hot rice. In Okinawa, a number of chazuke variations with a Chinese influence are made. The only difference is that the stock is made from both pork and fish.


    Get FREE Japanese Recipes by Email! Sign Up Now!

    Japanese salad dressing recipes
    .

    Tai Chazuke Recipe

    chazuke rice recipe

    Tai Chazuke

    Lucy Seligman
    No ratings yet
    Course Main Course, Snack
    Cuisine Japanese
    Servings 4

    Ingredients
      

    • 9 ozs (250g) sliced very fresh sashimi-grade tai (sea bream), cut sashimi style
    • 3 tbsp soy sauce
    • 3/4 tsp sansho (ground Japanese pepper), or to taste
    • 3 cups firm, hot, freshly cooked Japanese white rice (can also use leftover or even cold rice)
    • Kizami Nori (seaweed slivers) to taste

    Dashi Stock (or use homemade)

    • 2-1/2 cups water
    • 1 tsp instant dashi granules
    • 1/8 tsp salt

    Instructions
     

    • Separate the fish slices and place in one layer on a flat dish. Combine the soy sauce and sansho pepper and pour the resulting mixture over the fish. Marinate for 15 minutes, turning once or twice. Meanwhile, prepare the dashi stock by bringing the water, stock granules, and salt in a saucepan to a boil. Cover and keep the stock very hot.
    • Just before serving, place the rice in four bowls and top generously with the seaweed. Place the fish slices on top of the rice in a sunburst pattern, covering the seaweed. Pour enough hot dashi stock over the rice, fish, and seaweed to nearly cover the fish. Lightly mix the result with your chopsticks and eat immediately. Tsukemono (pickled vegetables) are a nice accompaniment to chazuke.

    Notes

    Some other common toppings include Japanese pickles, umeboshi, sesame seeds, salted salmon, trefoil, scallions and wasabi.
    If you decide to use good quality strongly brewed green tea instead of dashi stock, top with a generous dab of wasabi to taste after pouring the piping hot green tea over the rice/fish combo and eat immediately.
    Tried this recipe?Let us know how it was!
    Recipe ingredients: Sansho pepper and Kizami Nori

    Do you love Tai Chazuke?

    Snap a pic and hashtag it #thanksforthemeal — I would love to see a photo of your Chazuke on Instagram and or Facebook, or leave a note in the comments section (see below) and let me know!

  • Chicken and Vegetable Zosui (Rice Porridge)

    Chicken and Vegetable Zosui (Rice Porridge)

    chicken zosui

    The History of Rice in Japan

    Wet-rice culture came to Japan during the dawn of the Yayoi period (300 B.C. – 300 A.D.), either directly from China or via the Korean Peninsula. It was a time characterized by people known as the Yayoi, new tools and farming techniques (such as growing rice in paddies), and a deep reverence for rice itself, typified by seasonal ceremonies and festivities that are observed to the present day.

    Contrary to popular belief, however, white rice didn’t become Japan’s primary grain until after World War II.

    Until then, grains like millet or barley were the dietary mainstays of most Japanese. Rice farmers didn’t get to enjoy the fruits of their labor very often, either. During the Edo Period (1603-1867), rice was primarily used to pay taxes to samurai landholders; a samurai’s wealth, in fact, was measured by the number of koku (a koku equaled to little over five bushels) of rice he collected. The only people who ate white rice in those days were samurai, the upper classes, and rich merchants, and they were prodigious consumers of the stuff. In 1859, for instance, members of the upper social strata ate an annual average of 228 kilograms of rice. In comparison, in 2017,  the average rice consumption rate was around 82.1 kilograms per person.

    Rice’s Importance in Japan

    Another reflection of the continuing importance of rice in Japanese culture is that the word gohan means not only “cooked rice” but “meal” as well. When somebody says “Gohan desu!” it can be translated as “Soup’s on!” During a typical day in a Japanese household, rice is served in many guises-plain rice accompanying a steaming bowl of miso soup and pickles for breakfast; a box lunch filled mainly with rice and topped with a fat umeboshi (pickled plum); onigiri (rice balls) for a snack; and for dinner, often rice, served in any number of variations.

    Zosui

    Zosui (rice porridge) also known as ojiya is one such excellent way to utilize left-over rice and make it into a meal.  Although my recipe uses chicken and vegetables, you could also do a simplified version just using flavored dashi stock of some sort, eggs, and minced green onions or trefoil as a garnish. It is also particularly tasty using left-over reserved soup stock from a nabemono (hot pot) meal such as Oden.


    Get FREE Japanese Recipes by Email! Sign Up Now!

    Japanese salad dressing recipes
    .

    Chicken and Vegetable Zosui (Rice Porridge)

    chicken zosui

    Chicken and Vegetable Zosui (Rice Porridge)

    Lucy Seligman
    No ratings yet
    Course Main Course
    Cuisine Japanese
    Servings 4

    Ingredients
      

    • 5-1/2 cups dashi fish stock
    • 3 tbsp sake, or to taste
    • 3 tbsp soy sauce, or to taste
    • 1 tsp salt, or to taste
    • 5-1/4 ozs skinned and boned chicken breast (150g), cut into small cubes
    • 1 ¾ ozs carrots (50g), peeled and cut into thin half-moons
    • 2 small turnips, peeled and cut in two, then cut into thin half-moons
    • 4-1/2 cups slightly undercooked short-grain Japanese rice (can also use pre-cooked leftover rice or even frozen rice)
    • 2 large eggs, slightly beaten

    Garnish

    • Use either minced green onions (to taste) or mitsuba (trefoil), trimmed and finely chopped with stems, to taste.

    Instructions
     

    • In a deep pot (ideally an earthenware one you can bring to the table for easy serving), add the stock, sake, soy sauce, and salt. Bring to a boil, mix well, then add the chicken and vegetables and cook over medium heat until halfway done.
    • Add the rice and cook, stirring occasionally, until the chicken and vegetables are completely cooked. Add the beaten eggs, stir once and turn the heat off. Cover the pot for a minute or two-the egg will still be undercooked and runny at this point-then sprinkle the top with either the green onions or trefoil, mixing it into the porridge if desired.
    • Serve immediately in soup bowls. A plate of tsukemono (pickles) would provide the perfect accompaniment to this dish.
    Tried this recipe?Let us know how it was!

    Do you love Zosui?

    Snap a pic and hashtag it #thanksforthemeal — I would love to see a photo of your Zosui on Instagram and or Facebook, or leave a note in the comments section (see below) and let me know!

    chicken zosui recipe
  • A Poetic Treat Called Ohagi (aka Botamochi)

    A Poetic Treat Called Ohagi (aka Botamochi)

    Though many of them would deny it, the Japanese are notorious sweet-eaters who indulge in a multitude of cakes, most often during teatime. This penchant for snacking dates back to the early Edo period (1603-1867), when eating two large meals a day was the norm – repasts punctuated by endless sweets and cups of green tea.

    Ohagi japanese sweet treat recipe

    Two distinct categories of sweets in Japan

    There are two distinct categories of sweets in Japan: wagashi, traditional handmade Japanese confections that are usually steamed or uncooked, and yogashi, or Western-style confections.

    Traditional Wagashi

    Wagashi have historically deep-rooted celebratory and often seasonal connotations, typified by the use of bird and flower names as well as other natural themes, such as uguisumochi (nightingale mochi [pounded rice] cake), sakuramochi (cherry mochi cake), noshiume (pressed plum cake); and rakugan (“falling geese” cake). The poetic nature of these appellations appealed greatly to monks, samurai, high-class merchants, and others of the intelligentsia.  And I will admit, I love Japanese treats (especially wagashi), which I can definitely trace back to my many years of studying the Tea Ceremony when I lived in Japan.

    Wagashi uses three primary ingredients

    Most wagashi uses three primary ingredients: glutinous rice, sugar, and azuki beans. Glutinous rice was first used in confections back in the Yayoi period (300 B.C.-A.D. 300). Sugar brought in from China during the eighth century, was most popular during the Edo period. Azuki beans, mashed, and sweetened, were introduced from China during the Kamakura period (1185-1333).

    Ohagi in the Autumn and Botamochi in the Spring

    One of the most popular types of wagashi, called ohagi in the autumn, also referred to as botamochi in the spring (bush clover mochi), depending on season and region, can be traced to the Heian era (794-1185).


    Get FREE Japanese Recipes by Email! Sign Up Now!

    Japanese salad dressing recipes
    .
    Ohagi japanese sweet treat recipe

    Ohagi (Botamochi)

    Lucy Seligman
    No ratings yet

    Ingredients
      

    • Chunky bean paste mixture*:
    • 7 oz. 200g dried azuki beans (soaked in cold water for up to 12 hours prior to cooking, then drained and rinsed)
    • 6 cups water
    • ¾ cup white sugar, or to taste
    • Dash of salt

    Rice ball mixture:

    • 5 ¾ oz. (170g) mochigome (glutinous rice)
    • 5 ¾ oz. (170g) short-grain Japanese rice
    • 2 1/3 cups water
    • ¼ teaspoon salt

    Garnishes:

    • ¼ cup toasted black sesame seeds
    • 3 tablespoons kinako, (soybean flour mixed with 1 tablespoon white sugar or to taste and a pinch of salt)

    Instructions
     

    • Place the beans in a mortar and crush them roughly with a pestle, adding the sugar and the pinch of salt a little at a time. Place the bean mixture in a clean pot and cook over low heat, stirring constantly, for 5 to 10minutes. The mixture will thicken slightly. Pour into a clean bowl and let cool to room temperature.
    • Wash and drain the rice. Add the water and salt and cook in an electric rice cooker. (The aim is to make slightly firmer rice, which is why less water than usual is used.) When the rice is cooked, let it rest for up to10 minutes. Sprinkle the salt on top, then semi-mash the rice using a mortarand pestle or a small wooden spoon. Divide into 14 to 16 portions and mold intoballs.
    • To assemble the ohagi, first wet your hands with salted water. Shape the still-warm rice balls into ovals, cylinders or rounds. (The shape and size of ohagi, by the way, are up to you.) Cover each ball with a thin film ofchunky bean paste. Roll the balls in the sesame seeds or soybean flour mixture,covering them thoroughly, or leave them as is. You can also make a small holein the bottom of the rice balls, add a small core of red bean paste, and thenproceed with the above method for covering the ohagi. Serve within 12 hours,with plenty of hot green tea as accompaniment.

    Notes

    *If you prefer to use ready-made chunky and or smooth red bean paste called anko, that works too!
    Tried this recipe?Let us know how it was!

    Matcha Source for matcha green tea powder

    Did You Make This Recipe?

    If you make this recipe, snap a pic and hashtag it #thanksforthemeal — I would love to see your creations on Instagram and or Facebook, or leave a note in the comments section (see below) if you make this dish!


  • Japanese Dry Curry – Pilaf Style

    Japanese Dry Curry – Pilaf Style

    japanese dry curry pilaf recipe

    We all know about saucy liquidy stew-like Japanese traditional curries—so many variations to choose from and try and make….but what about Japanese Dry Curry-Pilaf Style?

    Have you ever made it? Quick, easy and tasty, and a wonderful way to use up all those bits and pieces lingering in your refrigerator.

    I don’t know about you, but I have been on the lookout for delicious and fast dishes that don’t take me hours in the kitchen, which is hot at the moment and seems to have become my first home in recent months of sheltering in place here in the Bay area.

    Hot Weather is Curry Weather

    I also find anything with curry stimulates the appetite, always a good thing in hot weather. There is a hint of sweetness in the use of raisins, but those can be optional, but it is a nice balance to the savory flavors of this dish.

    dry curry japanese recipe

    This is a very forgiving dish and it is fun to create your own and new combination of ingredients. Use my recipe first as your guide, then go wild, and let me know what you came up with! It is also the perfect dish for a bento lunch and or served at room temperature.


    Get FREE Japanese Recipes by Email! Sign Up Now!

    Japanese salad dressing recipes
    .
    japanese dry curry pilaf

    Japanese Dry Curry – Pilaf Style

    Lucy Seligman
    No ratings yet
    Course lunch dish, Side Dish
    Cuisine Japanese
    Servings 4

    Ingredients
      

    • 3 to 4 cups cooked Japanese rice
    • 7 to 8 ounces meat: such as ground beef, thick bacon, ham, chicken or seafood, such as small shrimp or scallops, chopped
    • 3-1/2 ounces carrots, finely chopped
    • 3-1/2 ounces green peppers, finely chopped
    • 3-1/2 ounces onion, finely chopped
    • 3 ounces green beans, thinly sliced
    • Salad oil as needed
    • 2 tbsps curry powder (Japanese-style), or to taste and desired hotness
    • 2 to 3 tbsps raisins (soaked in warm water to soften), drained, optional
    • Salt and pepper to taste

    Garnish:

    • 3 ounces cooked green peas*

    Instructions
     

    • Chop all vegetables and meat (if necessary) into roughly the same size. Sauté vegetables in a little oil, until soft. Add desired protein. Continue cooking until done, adding curry powder and raisins.
    • Add the cooked rice, chopping it up (use the back of your wooden spoon), and combining with the rest of the ingredients. Cook until the rice is heated through.
    • Just before serving, add in the green peas and season to taste with salt and pepper. Serve hot.

    Notes

    Other garnishes you could use: Minced parsley or some boiled Broccoli florets, or you could do a garnish of Japanese pickles, such as crunchy Rakkyo (pickled Japanese scallions), the traditional garnish for Japanese curry.  You can also garnish the plate with avocado and red onion slices in a light vinaigrette to make a more complete meal.
    Tried this recipe?Let us know how it was!

    Leave a note in the comments section and let me know if you made this recipe and how it turned out!

  • Omuraisu (Rice Omelette)

    Omuraisu (Rice Omelette)

    Omurice recipe (Japanese Rice Omelette)One great way to instill smart, healthful lifetime eating habits in your kids is to have them planning menus, preparing dishes, and cleaning up right alongside you. By doing so, you can expose youthful palates to a wide variety of foods, teach kids to ascertain the freshness of ingredients, show them the right way to use utensils and other cooking equipment, and get them to read recipes, follow directions, and pick up some elementary math.  And it really doesn’t end with young kids, as I am now helping my college-aged daughter to expand her culinary repertoire from afar.

    Omuraisu (Rice Omelette) Recipe

    In any case, kids’ innate curiosity and creativity are definitely worth harnessing in the kitchen. In Japan and the US, the trend is evidenced by a whole spate of cookbooks, cooking classes, and television cooking shows aimed at children. Boys as well as girls will quickly find that cooperative cooking can be an easy and enjoyable daily activity involving the whole family, including dads. And best of all, very few children would refuse to sample at least a few bites of something they had a hand in cooking!  Their creativity really comes out in how they decorate the top of the omelette using ketchup: hearts, the peace sign and smiley faces are all popular favorites. This recipe is derived from Yoshoku: the Japanese interpretation of Western dishes, which originated during the Meiji Era (1868-1912.)

    Omuraisu (rice omelette), an all-time favorite of Japanese children (and most of their parents, for that matter), is a perfect dish to start with in this quest. It’s surprisingly easy to make – the most exotic seasoning you will need is ketchup. It is also an easy, great and tasty way to use up cooked Japanese rice!


    Omurice recipe (Japanese rice omelette)

    Omuraisu (Rice Omelette)

    Lucy Seligman
    No ratings yet
    Course Breakfast
    Cuisine Japanese
    Servings 4

    Ingredients
      

    • Vegetable oil as needed

    • Butter as needed
    • 3/4 cup white onion, peeled & minced
    • 2/3 cup boneless ham*, finely chopped
    • 7-8 tbsp Ketchup, or to taste
    • 2 cups Japanese white rice, day-old firm, cooked & warmed up
    • 4 tbsp dry white wine (optional)
    • salt and pepper to taste
    • 8 eggs

    Garnish:

    • additional ketchup
    • parsley sprigs

    Instructions
     

    • To make the filling, first heat a small amount of oil in a 10-inch frying pan. Drain off oil and
      reserve. Melt two tablespoons of butter in the same pan. Sauté the onions and
      ham over medium heat until the onions are transparent. Add ketchup and mix
      well. Add the rice and wine (if desired) and stir well until combined. Season to
      taste with salt and pepper. Transfer the rice mixture to a bowl and cover with
      plastic wrap to keep it warm.


    • To prepare the omelette, first break two eggs in a bowl and stir lightly. Season to taste with
      salt and pepper. Prepare the same pan by heating the oil reserved previously in
      it and then pouring off any excess. Add one-half tablespoon of butter and heat it
      until it sizzles. Add the eggs and make a very soft, light-colored omelette.


    • While the eggs are still soft, place a quarter of the rice mixture in the center, cover with a
      plate and turn over. Place a paper towel over the omelette and use it to shape
      the omelette into a long oval, tucking in the edges neatly. Garnish the center
      with ketchup and parsley. Make the other three omelettes in the same manner.
      Serve hot.


    Notes

    *You can replace the ham with small pieces of skinless and boneless chicken breast (sautéed with salt and pepper or herb salt).
    Tried this recipe?Let us know how it was!

    Do you have Lucy’s cookbook yet?

    Osechi cookbook New Year Seligman
    Leave a note in the comments section and let me know if you made this recipe and how it turned out!


    Get FREE Japanese Recipes by Email! Sign Up Now!

    Japanese salad dressing recipes
    .
  • Bamboo Shoot, Chicken and Fried Tofu Mixed Rice Recipe

    Bamboo Shoot, Chicken and Fried Tofu Mixed Rice Recipe

    Bamboo Shoot rice japanese recipeWe know spring is here when fresh bamboo shoots start popping up from the ground. In keeping with the traditional Japanese concept of enjoying food during its peak season, why not try this tasty and easy version of bamboo rice to celebrate spring, the season of renewal. I know I am ready for spring….aren’t you?!

    My very first blog posting two years ago was a bamboo shoot recipe, and so is today’s.  This is one of my favorite mixed rice recipes. And if you can’t buy fresh bamboo shoots, this can still be delicious using precooked peeled and or canned bamboo shoots.


    Bamboo Shoot rice japanese recipe

    Bamboo Shoot, Chicken, and Fried Tofu Rice

    Lucy Seligman
    No ratings yet
    Servings 4

    Ingredients
      

    • 1 piece of abura-age (fried tofu)
    • 7 ozs. fresh*, precooked peeled or canned bamboo shoots, thinly sliced
    • 3 ½ ozs. chicken breast, skinned and cubed
    • 1 tablespoon vegetable oil
    • ½ cup dashi (fish stock)
    • 3 tablespoons low-salt soy sauce, or to taste
    • 4 tablespoons sake
    • ½ teaspoon salt
    • 3 cups Japanese white rice, washed and drained
    • 1 piece of kelp, wiped with a damp cloth

    To garnish:

    • Dried seaweed, cut into thin strips

    Instructions
     

    • Before starting, immerse the fried tofu in hot water for 10 minutes to get rid of the oil. Squeeze out excess water and slice into strips. If using canned bamboo shoots, boil for a minute or two and then rinse.
    • Sauté the cubed chicken and fried tofu in oil. Add the sliced bamboo shoots, dashi stock, 2 tablespoons of soy sauce and 2 tablespoons of sake. Cook until all the liquid evaporates, roughly 10 minutes. Set aside.
    • Place the rice in an electric rice cooker or large saucepan. Add the remaining soy sauce and sake, and salt. Place the piece of kelp on top. Add water and cook according to rice cooker directions or, if using a saucepan, until the water is fully absorbed. When the rice is done, remove kelp, add the chicken and vegetables and stir well. Cover and let sit a further 10 minutes before serving.
    • Place in rice bowls and top with a generous amount of dried seaweed. Serve immediately. Clam soup makes a nice accompaniment.

    Notes

    *If using canned or precooked peeled bamboo shoots, drain and rinse them thoroughly in cold water before preparation. If the shoots are fresh, cut off the hard bottom part and boil them in their husks – water left over from washing rice or rice bran is best for this – with a dried red pepper for about one and a half hours to remove bitterness. Let cool, then peel off the husks. Wash well in cold water and continue with recipe preparation.
    Tried this recipe?Let us know how it was!

    Leave a note in the comments section and let me know if you made this recipe and how it turned out!


    Get FREE Japanese Recipes by Email! Sign Up Now!

    Japanese salad dressing recipes
    .