Readers are always sharing new “Japanese finds” with me either when I am traveling or at home in the Bay area. This blog post about Kettl Tea is as a result of my niece, Corina Seligman. (Have you read her guest post on sake btw?) She knows of my passionate love of all things Matcha and suggested I go. Since I was staying in Brooklyn for a few nights after dropping my daughter off to college for her freshman year, (Sob, sigh, pride…) the subway was a breeze since my friend and hostess, Susan, is the Subway Master! I can’t wait to go back.
During a recent trip to New York City to settle my daughter into her first year of college, I discovered Kettl Tea, an absolutely charming little Japanese tea and ceramic shop, situated in a small gallery space, based in Brooklyn. Although Zach Mangan, the owner, wasn’t there during my visit (I found out later that he was in Japan sourcing tea), my friend Susan and I were excellently taken care by Emma Porter, who was managing the store in his absence.
It was a very hot and humid late summer day, so I asked Emma if she could make us an iced Matcha flight. She served us two matchas to enjoy. Uchu, from Uji City, Japan was classically elegant, sophisticated with a mild tart finish. The other one was Hibiki from Hoshinomura, Japan, was creamy, smooth and had a lingering grassy aroma that I adore. Susan had never had Matcha, but fell in love with the taste. Being Matcha-obsessed, I was in heaven. This little oasis of serenity was so enticing, that we lingered over our Matchas, talking to Emma about Kettl’s teas and exquisite teaware ceramics, and her passion for kaiseki ryori (traditional Japanese multi-course haute cuisine) for a long time.
Kettl sells a wide variety of Japanese teas, from Matcha, Sencha, Gyokuro to Soba Cha, Oolong, to Houjicha and so on.
They call themselves a NYC/Fukuoka based tea company. Like Breakaway Matcha on the West Coast, Kettl, sources their teas directly from 14 different growers/suppliers that they have a personal and ongoing relationship with from 8 different prefectures in Japan. They consider them all to be their partners. Their teas are shipped weekly from Fukuoka, Japan. Once again, I love finding small companies in the States who are obsessed with introducing hand-crafted Japanese beverages and or foods. I will be writing about another find of mine called The Japanese Pantry here in the Bay Area in an upcoming posting.
Next time, I plan to make a day of it and visit Okonomi Restaurant, which serves Japanese breakfast in the mornings and Ramen at night! I love it! Like Kettl, they also offer cooking classes. According to Kettl’s website, Japanese tea is their passion. No doubt about that!
Making rice the proper way is an art in Japan, one that often takes many years to perfect. The importance of this is reflected by the overwhelming number of Japanese meals that end with a bowl of pearlescent, impeccably cooked short-grain white rice, pickles, and miso soup. Rice’s versatility doesn’t stop there, of course. One common variation is the vinegared rice used for sushi; another is the glutinous rice used to make sekihan (red rice) for celebrations.
Then there is the whole spectrum of mixed rice dishes. In Japan, the idea of mixing or cooking rice with other ingredients dates from the Heian era (794-1185). Rice in those days was so scarce and expensive that even for aristocrats combining rice with other foods was commonplace. Until the 1950s, people continued to prepare these kinds of dishes to supplement their rice – still a costly commodity – and to use up leftovers. Now it has become practically a fad to mix rice with such diverse ingredients as bamboo shoots, beans, chestnuts, and so on.
There are two main categories of mixed rice dishes: takikomi-gohan, which is rice cooked with something else; and maze-gohan, which is rice mixed with something else. The differences between the two involve how and when the other ingredients are added to the rice. To make takikomi-gohan, for instance, uncooked or precooked ingredients are either combined with the raw rice or added during the cooking process. Maze-gohan dishes involve blending in precooked and often flavored ingredients with cooked rice during the interval just before serving. The flavoring for both these forms of mixed rice is either salt or soy sauce-based.
Mixed rice dishes are known by many different names according to their region of origin and their ingredients. Further complicating the situation is the frequent substitution of the word “meshi” for “gohan” to mean rice. Some are popular nationwide and in all seasons. There are also special mixes with a seasonal connection, including bamboo-shoot rice (takenoko-gohan) in the spring and broad-bean rice (soramame-gohan) in the summer.
Kurigohan (chestnut rice) is another of these seasonal treats, a beloved favorite during the autumn months, and one of my favorites. There are two rice dishes, in fact, that typify autumn in Japan. One is made using matsutake mushrooms, often called “the truffles of the East”, real specimens of which are almost prohibitively expensive and virtually impossible to obtain outside of Japan. The other, of course, is chestnut rice, which uses inexpensive ingredients and can be enjoyed and savored almost everywhere.
10oz.300g peeled fresh chestnuts*, whole, halved, or quartered
½teaspoonsalt
1tablespoonlow-sodium soy sauce
3tablespoonssake
2 ¾cupswater
3-inchsquare of dried konbukelp, wiped with a damp cloth and lightly slashed to release its flavour
Instructions
Put the washed rice in an electric rice cooker or large saucepan. Blend the salt, soy sauce, sake, and water until the salt dissolves. Pour over the rice and stir lightly. Top with the kelp and cook. For the last 15 minutes of cooking, remove the kelp and place the chestnuts on top of the rice. When the rice is done, let it rest for 15 minutes, then gently mix in the chestnuts. Serve hot.
Notes
*Soak the chestnuts overnight in cold water (or soak in boiling water for 5 to 10 minutes) to make them easier to peel. Cut off the rounded end with a sharp paring knife, then remove the hard outer shell and the thin inner skin. Wash the peeled chestnuts lightly in cold water to get rid of their starch. To prevent discoloration, keep the chestnuts in a bowl of cold water until it is time to add them to the rice, then drain them and proceed with the recipe.
I recently returned to Japan for a long-planned for visit after a 25 year absence. Really?! It just never felt like it had been that long, probably because a part of my heart has always resided in Japan—ever since I first visited its shores when I was 15 years old. But this trip was a little different and very special; for I was joined by my teenage daughter for her high school graduation present. This was her first trip to Japan and I don’t know who was more excited to go there! We planned the details of this trip for months and months, consuming a lot of homemade Japanese dinners, and watching endless vlogs on Japan that my daughter discovered in the process.
Despite 2 mild earthquakes, a typhoon, the rainy season, flooding in Kyoto and deadly heat and humidity, we managed to cram in an amazing amount of activities and food! during our 2 week visit. I will be posting separate posts on our food experiences in both Tokyo and Kyoto, etc.
But this post is about what I experienced and thought about during this trip, going back after such a long absence, and seeing Japan as a Japanese-speaking quasi-tourist versus a long-term resident.
A few days into the trip, I asked my daughter what she thought of Japan. She replied, “I love it! I want to come back, but when it is cooler so I can wear layers!” I beamed with a huge smile, and thought, my job is done here!
So in no particular order, here it goes:
Japan Travel Tips:
Portable WIFI and Japanese Sim Cards
Unless you have a really affordable international plan for your phone, reserve a portable WIFI for pick up at a Japanese airport in advance. It was a lifesaver to have it because surprisingly, WIFI isn’t always readily accessible in Japan. The other trick I learned was to buy a Japanese Sim card upon arrival to replace your usual sim card. It worked for my daughter’s Iphone, but not for my Android. Regardless, we had no additional charges for phone use. Also, download the very popular LINE app to use while there for instant messages, etc. Having your own WIFI is also crucial if you plan to do any traveling on your own. Google maps, etc will become your best friend!
Accessibility
I will be honest that if I wasn’t still recovering from 2 broken ankles, I may not have even noticed. Sometimes walking to an escalator and or elevator at a train or subway station was such a long schlep, which made using the stairs (however slowly) quicker. On the other hand, I noticed a lot of accessible public bathrooms. The day we flew back to USA, there was a big article in one of the English newspapers that Tokyo is really working on enhancing accessibility before the 2020 Olympics. Good!
Travel Light
Travel light in Japan, especially if you plan to use the trains to venture out around the islands. Space is limited in hotel rooms, and on trains and you are the one carrying everything!
The heat and humidity
I had forgotten how suffocating and all-encompassing hot it is when you land in Japan during the summer, much less when you step out of a shower. You are drenched in sweat. Houses don’t typically have central air, so moving from room to room can be very hot and sweaty as well. Handkerchiefs and small padded face towels are a big business in Japan, especially during the summer. They even have shops dedicated to just those items. I came home with a colorful selection of both!
Lack of street parking
There is no street parking readily available in Tokyo in the suburbs due to lack of space and narrow roads, I guess. And parking is very pricey and limited. The up side? Public transportation is readily available and cost-efficient.
Following the rules
Train and subway stations are very orderly, even during rush hour (an experience in and of itself), and it is because everyone follows the rules; whether it be which side to walk on (going up and down stairs), or where to wait and or line up for a train or subway. But, beware, it is also regional! Kyoto stations were the opposite to Tokyo’s in terms of what side to walk up or down on!
Suica cards
These easy pre-paid smart cards can be used in public transportation (such as subway, trains, buses, monorail) and also can be used at a lot of stores, taxis, vending machines and so on.
7-11 stores
We ended up at these stores a lot, as they are one of the few that lets you pull out cash from their ATM machine using an American debit card.
Signage
Street and highway signs are in both Japanese and English. Yeah! Train and subways stations and on the trains/subways have signage in Japanese, English, Chinese, and Korean. And there are digital displays inside the trains/subways as well, also in Japanese, English, Chinese and Korean.
Feeling Safe
Never crossed our minds that we weren’t safe and this included wandering around Kyoto at night in alleyways so that my daughter could take pictures and videos.
Musings 25 years later:
Japan is/remains my happy place
I smiled for 2 weeks straight, 24/7! I would wake up smiling every morning. I started dreaming in Japanese and in color from the first night. It was fun that my primary language for the two weeks was Japanese.
The friendliness of the Japanese
My daughter had 4 years of high school Japanese under her belt, but had never tackled the public transportation system in Japan, while using her Japanese, which she insisted on doing on her own a number of times. Despite getting lost many times, she always made it back safe and sound. The first time she got lost, she asked an obaachan(Granny) for help, who couldn’t help but asked a younger woman. That wonderful woman walked my daughter to the nearest station and made sure she got on the right train! Wouldn’t have ever happened here in the States.
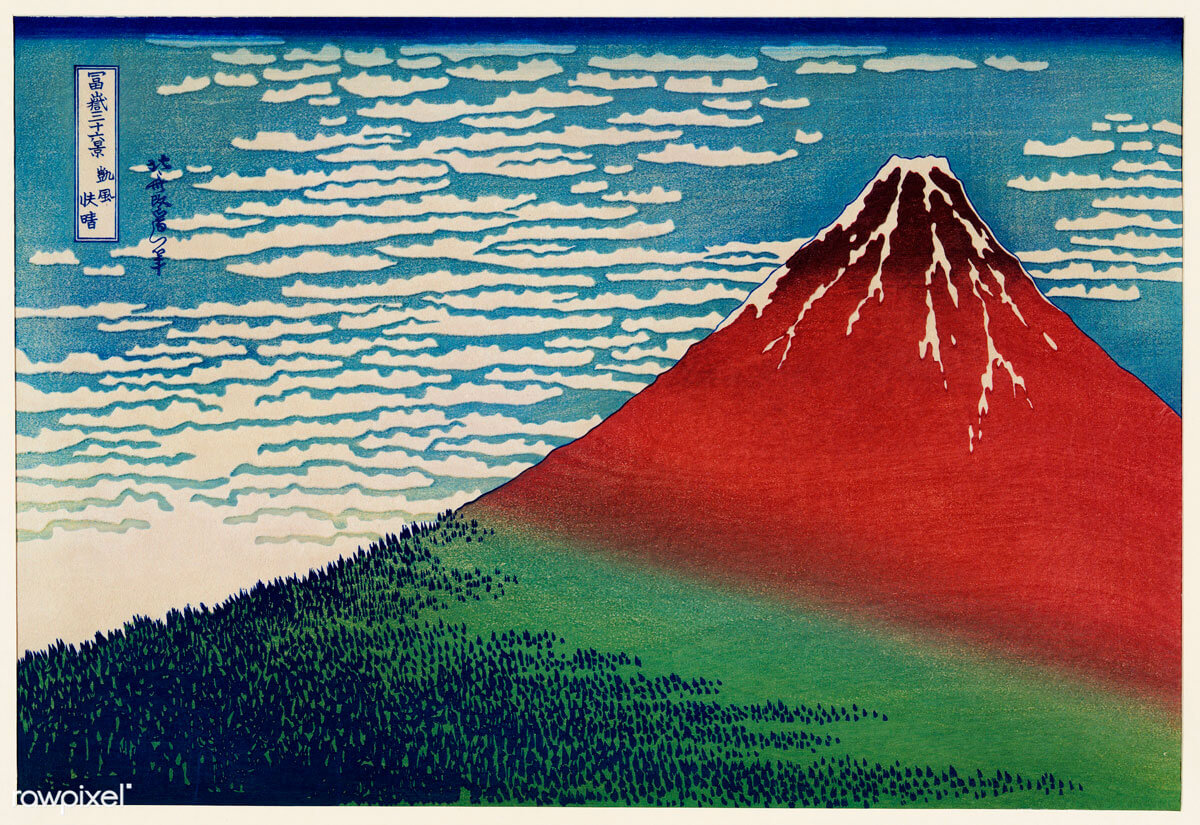
Missing seeing Mt. Fuji
I even reserved seats on the right side of the bullet train to Kyoto so that we could see it, but alas, the weather wasn’t being agreeable both times we were on the bullet train. Disappointing as I love seeing Mt. Fuji. Oh well, next time.
No bad meals
We never had a bad meal for the whole 2 weeks we were there. Can’t say the same if you were visiting the US! Every meal we had was also visually beautiful and appealing. More on food in upcoming blog posts.
Catching up with old friends
It felt like yesterday catching up in person and on Facebook Messenger with old friends, some I hadn’t seen in too many years. As my old friend Doug said “Ok, give me the Reader’s digest version of the last 25 years of your life!” We ended up talking non-stop for close to 3 hours.
Bizarre Crimes
When I lived in Japan, there was the underwear thief, but he only stole foreigner’s undies from clothes lines on verandas in Tokyo. Happily, he never found my undies as I always lived too high up! I heard from a long-term Tokyo resident from California, that the latest ‘bizarre’ crime is a man squirting mustard on women and running away. An urban myth, shaggy dog story or ?
How international Japan has become
When I lived in Japan, I always stood out as a foreigner everywhere I went. No more. Everywhere we went, whether in city centers and or suburbs, there was always a plethora of foreign residents and foreign-owned businesses. Wonderful to see all the different faces and hear all the different languages.
Lawson(convenience store franchise chain, originally from the US)
When I lived in Japan and wanted tortillas, I had to make them with masa flour I brought back from the States. Lawson not only had a variety of Mexican foods, but also had selections of gluten-free, organic, and Indian foods.
100 and 300 yen stores + Hello Kitty
We loved these affordable stores, both to pick up practical items, but also the whimsical. Where else can you find Hello Kitty snack bags?!
Speaking of Hello Kitty, there is a Hello Kitty store at Haneda Airport and also there is a special bullet train decorated as Hello Kitty.
Trying to buy left-handed knives
Finding a good fish knife to cut sashimi etc. was a big goal for me for this trip. But, being a lefty prevented me from finding one! I must have gone into 5 different stores in Tokyo’s Kappabashi area (the kitchen ware area), but no luck.
What did we miss most?
Sofas to lounge on! Of course, if we had visited during the colder months, we would have been able to lounge around in a kotatsu (Japanese heated table) on the floor.
We can’t wait to go back and are already planning where to go, where to shop, what to eat, etc.
When was your last trip to Japan? What made it memorable? Reply in the comments and let me know!
Get FREE Japanese Recipes by Email! Sign Up Now!
Get Lucy’s ebook, “How to Make Traditional Japanese Salad Dressings” FREE when you subscribe.
Portuguese and Spanish missionaries started trickling into Japan to spread the teachings of Christianity near the end of the Muromachi era (1392-1567), and their first foothold in Japan was Nagasaki. The Japanese took to referring to all Europeans as Nanbanjin or “Southern barbarians,” and gradually the term “nanban” came to mean anything related to European civilization; even the ship that brought the missionaries to the shores of Japan was referred to as nanbansen.
In addition to importing a different religion and culture, the priests also sparked a culinary revolution of sorts. Nanban ryori (“Southern barbarian cuisine”) was a style of cooking characterized by deep-frying and the use of dried hot red peppers and onions, both of which the newcomers employed liberally in their cuisine. However, since the onion didn’t come to Japan until the seventeenth century and wasn’t popular until the Meiji era (1868-1912), Western cooks took to using Japanese leeks instead. The Japanese liked what they tasted and began creating dishes that used these two ingredients.
One example is kamo nanban – soba with wild duck and leeks. By the Edo era (1603-1867) many cookbooks referred to any dish using leeks as nanban-style cooking. The preferred method of cooking in this Nagasaki regional cuisine was deep-frying. The frying of food, including tempura, can be traced back to the meatless Fridays the devoutly Catholic Europeans observed for religious reasons.
Nanbanzuke (aka Nanban-zuke) is one facet of Nagasaki’s regional cooking style, and among its most enduring variations is Aji no Nanbanzuke. To make this dish, small horse mackerel are deep-fried and then marinated in a vinegar-based sauce that includes red peppers and leeks. Summer is considered the best season for horse mackerel, which is often served as sashimi, salt-grilled, boiled, or deep-fried. Many people think the latter is the best of all.
During a recent trip back to Japan this summer, I not only enjoyed Aji no Nanbanzuke, but I helped cook a home-style version of this style of cooking using chicken and assorted vegetables. (I will post that recipe in the future.) What I like is that this is a pretty forgiving dish; an easy and delectable way to eat a lot of vegetables during hot and humid summer days, not to mention succulent fish and or chicken, and surprisingly light despite it being a fried dish!
Leave a note in the comments section (see below) if you make this dish!
8small whole fresh aji(horse mackerel or sardines), cleaned, scaled, gutted, and deboned
1 ½teaspoonscoarse sea salt
All-purpose white flour as needed
Vegetable oil for deep-frying
Nanbansu (vinegar sauce)
7tablespoonscold water
1 ½tablespoonswhite sugar
3tablespoonssake
2 ½tablespoonssoy sauce
1or 2 small dried red peppers,seeded & sliced thinly
3 ½tablespoonsrice vinegar, or to taste
½Japanese leek, white part only,charred & quartered or replace with 1 small onion, peeled & thinly sliced
Garnish
Minced green onion to taste
Optional Additional Vegetables if desired:
1 or 2piman (Japanese green pepper),seeded, cored and thinly sliced into strips
1small carrot,peeled and thinly sliced into strips
Instructions
Wash the cleaned fish and sprinkle them with the sea salt. Let sit for 15 to 20 minutes, then wash the salt off in cold water and dry the fish well with paper towels. Dredge in flour. Deep-fry in the vegetable oil until the fish start to float and turn golden-brown. Drain quickly on paper towels, then place the still-hot fish in a shallow, nonaluminum container.
While the fish are being salted, make the sauce. Bring the water, sugar, sake, soy sauce, and red peppers to a boil. Turn the heat off and add the vinegar, leeks, and any other vegetables if using. Pour the sauce over the fish, let cool to room temperature, cover with plastic wrap, and refrigerate for up to two days, turning occasionally.
To server: Drain the fish and vegetables, and place on a serving plate. Sprinkle the fish generously with the minced green onions and drizzle a little of the sauce over them. Serve cold.
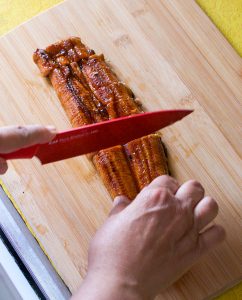
Once tasted, the delicate flavor of eel (unagi), prepared according to the special ways of Japanese cuisine, will linger in your memory forever. Since the Edo period (1603-1867), eel has traditionally been eaten in the height of midsummer on the Day of the Ox (July 23); popular custom has it that anyone who eats eel on this day will have extra stamina to cope with the summer heat. This is a custom I follow to this day! But the true gourmet’s season for eel consumption is late fall to winter (the time of spawning), when eel are at their best, even tastier than usual.
Not sure where to get ingredients?
I like NIHON ICHIBAN (a shop for authentic Japanese products run by the same family for 5 generations). This is an affiliate linkso without costing you anything extra, I’ll earn a small percentage of the sales if you purchase items through this link. Thank you for your support!
There are many ways to serve unagi: the most popular is kabayaki, eel grilled in sauce, served separately from rice; if served on rice, it is called unaju. Or there is shirayaki, eel grilled without sauce, served with wasabi (horseradish) and soy sauce. A more unusual dish, unagi kamameshi, is the creation of Torisuzu, a chain of restaurants in Nagoya, where I lived for a number of years. It combines flavored rice and grilled eel with a tasty stock poured over the top, and wasabi and chopped green onions for an extra flourish. After tasting this dish just once, you’ll be a convert for life.
Be warned, this recipe needs constant attention – no running away from the stove while it’s cooking.
Buy the unagi sauce from a Japanese supermarket or supplier as it is virtually impossible for the home cook to make – in the kitchen at Torisuzu, a large vat of unagi bones, soy sauce, sugar, and mirin (sweet sake) is kept specially heated and cooking for a full three months before use. It’s also advisable to buy ready-grilled kabayaki eel (frozen if necessary), as grilling fresh eel is an intricate art unto itself.
14oz.kabayaki (grilled eel, thickly sliced),Look in Japanese supermarkets, they are usually sold in vacuumed sealed packages in the frozen section.
For the stock:
3cupswater
1 ½teaspoonsdashi (fish stock granules)
1 ½teaspoonslow-salt soy sauce
1 ½teaspoonssake
A pinch of salt
To garnish:
½cupminced or finely chopped green onions
Wasabi horseradish to taste
Instructions
Wash the rice until the water runs clear. Drain and let sit for 30 minutes prior to cooking.
Place the rice and water in a heavy, deep, medium-sized saucepan with a well-fitting lid. Boil vigorously, uncovered, for 12 to 15 minutes, stirring occasionally. To keep from boiling over, tap the top of the pan a number of times with a spoon. Most of the water should disappear – if it evaporates too quickly, turn down the heat during the last few minutes of cooking to avoid burning.
Pour in the unagi sauce and mix well, then turn heat down to medium-simmer, cover the pan, and cook for 5 minutes. Add the eel slices, cover again, and simmer for a further 5 minutes. Turn off heat and let sit, covered, for 5 to 10 minutes.
Meanwhile, prepare the stock. Heat water and stir in the dashi until dissolved. Add soy sauce and sake and adjust seasoning.
To serve, mix the eel into the rice and serve in individual bowls. Pass the stock, green onion, and wasabi separately, allowing each person to mix in as they desire.
Not only can you find a number of recipes from Nagoya on Thanks For the Meal, but we have a whole collection of regional Japanese recipes from across the country.
Get FREE Japanese Recipes by Email! Sign Up Now!
Get Lucy’s ebook, “How to Make Traditional Japanese Salad Dressings” FREE when you subscribe.
Thank you!
You have successfully joined our subscriber list.
Here’s the one I purchased at my local Asian mall. Leave a note in the comments section (see below) if you make this dish!
Miso (fermented soybean paste) is not only considered a condiment, spice, and seasoning in Japan but a way of life as well. I can think of no equivalent food in Western cuisine that has had such a powerful impact on culinary culture, not to mention societal relations.
Miso is believed to have been created in China, brought to the Korean Peninsula, and then introduced to Japan – the same route taken by many of Japan’s fermented and preserved condiments, including soy sauce. By the Nara era (710-84), miso was being made and sold in the city of Nara, and was even being taxed. The Engishiki, compiled in 927, was the first historical document to mention miso. A popular form of miso among aristocrats during this period was name (“licking”) miso, a form of highly spiced and salted miso mixed with pickled vegetables that the nobles enjoyed while drinking sake.
By the Kamakura era (1185-1333), Buddhist strictures were influencing everyone from the higher classes and samurai down to the peasantry. Zen monks, highly experienced at making miso because it was one of the key components of shojin ryori (vegetarian Buddhist cuisine) helped introduce the flavorful paste throughout Japan.
Shogun Tokugawa Ieyasu (1543-1616) did much to popularize miso soup as the first Japanese power breakfast. He recognized that miso would assist warriors during times of battle by supplying them with the necessary protein they needed to fight on. By 1600, a typical breakfast consisted of miso soup, rice, and pickles, which to many Japanese constitutes the perfect breakfast even today.
Currently there are several hundred types of miso being sold, each made according to the climate and taste preferences of the region in which it is produced. Miso can range in color from a rich brownish-red to light yellow; typically, the darker the miso, the higher the salt content. It is often said that hatchomiso, made in Aichi Prefecture since the early 1500s, is one of the few remaining traditionally made kinds of miso in Japan, and one of the most flavorful. Try some of this delicious deep red miso in your next bowl of miso soup as a variation. If you prefer a milder version, then use white miso.
3 1/3cupshot dashi fish stock(can be made from kombu kelp, katsuobushi [dried bonito flakes], or a combination of the two; instant dashi granules or powder also acceptable)
4tbspsmiso (use red, white, or light-colored miso or a combination thereof)
Instructions
Place the stock in a saucepan and heat until very hot. Add whatever ingredients you are planning to use (see recipe notes for 3 of my favorite variations), and cook until done.
Place the miso into a small bowl and mix with a little of the stock, using a miso muddler to make a thick paste. Just before serving, add the miso paste to the soup; reheat it if necessary, taking care not to boil the soup after adding the miso, since this will make it taste bitter.
Ladle the soup into soup bowls – lacquerware ones not only retain heat well; they also add a touch of authenticity – then garnish and serve immediately.
Notes
Some Favorite Combinations:
Tofu and Wakame Miso Soup – Use ½ block of silky tofu, cut into small cubes, and 1 ounce (30 grams) of rinsed and chopped raw wakame kelp. Garnish with mixed green onions or negi (Japanese leeks).Clam and Trefoil Miso Soup – Soak 1 ¼ cups of small clams for 30 minutes in a bowl of cold salt water to rid them of sand and impurities. Drain and rinse well. Place in the hot stock and bring to a boil, discarding any clams that don’t open. Turn heat down to a simmer and add 4 tablespoons of akadashi (a type of mixed miso) to the soup. Garnish with chopped mitsuba (trefoil) or seri (Japanese parsley).Pumpkin and Abura-age Miso Soup – Cut up 2 ounces (60 grams) of unpeeled kabocha (Japanese pumpkin) and ½ sheet of abura-age (fried tofu). Prior to using the fried tofu, pour boiling water over it to get rid of any excess oil. Garnish with minced Japanese leeks or green onion (white part only).
Walk out of almost any train station in Japan in the evening, look for a restaurant with an akachochin (red lantern) outside, and inside you’ll find groups of salaried workers talking, drinking, and consuming countless skewers of yakitori, this country’s version of shish kebab. There is something very seductive about the smell of meat grilling over charcoal, which may help to explain the nation’s enduring love of yakitori.
The forerunner of yakitori was a variety of small birds, such as quail or sparrow, split open, flattened and grilled. True yakitori, spitted on skewers, appears to have originated in yatai – food stalls – in Tokyo during the Meiji period (1868-1912). At that time chicken was prohibitively expensive, so beef and pork intestines were primarily used. The notion of grilling food caught on during this period, as Japan opened up to Western influences, including cuisine.
As the price of chicken decreased in Japan, particularly in the Sixties when “broiler” chickens were introduced, it became the most common yakitori ingredient. These days, yakitori usually consists of chicken parts and vegetables skewered on sticks, grilled, and either sprinkled with salt or brushed with a sweetened soy-based sauce.
1-1/2lbsboned chicken leg or thigh meat, cut into 1-inch pieces
8washed & halved chicken livers (or chicken gizzards or rolled pieces of skin)
8small chicken wings (salt grill only)
1 green bell pepper, seeded and cut into 1-inch pieces
1 or 2large Japanese leeks (naganegi), white part only (or white onions), cut into 1-inch pieces
Yakitori Sauce:
3/4cupmirin (sweet rice sake)
2tbspsrock sugar, or 1 tbsp white sugar
3/4cuplow-sodium soy sauce
1 or 2roasted or grilled chicken bones, optional
Garnish:
Ground Japanese pepper (sansho)
Seven-spice pepper mixture (shichimitogarashi)
Lemon wedges for salted skewers
Instructions
Put the mirin and sugar in a saucepan and warm, stirring well, over medium heat until the sugar melts. Add the soy sauce and chicken bones (if used), and bring the mixture to a boil. Turn the heat down and simmer, uncovered, for about twenty minutes. The sauce should reduce about 30 percent, and be thick but still pourable. Strain it and cool to room temperature. Since the cooking time for each ingredient varies, each should be threaded on separate skewers – 8- or 10-inch bamboo skewers or short steel shish-kebab ones – except for chicken pieces alternated with leeks, a traditional combination. Four pieces per skewer is best. Prepare a barbecue, grill, or broiler. For best results, use charcoal. Grill the skewers, unseasoned at first, turning every few minutes until the ingredients start to brown and the juices begin to trickle out. At this point, either salt both sides of each skewer or dip it into the sauce. Grill for a few more minutes, turning occasionally, then remove the salted skewers for immediate consumption; dip the other skewers into the sauce again and grill them twice more, the second time returning them to the fire only briefly. Serve the sauced skewers with garnishes and the salted ones with lemon wedges.
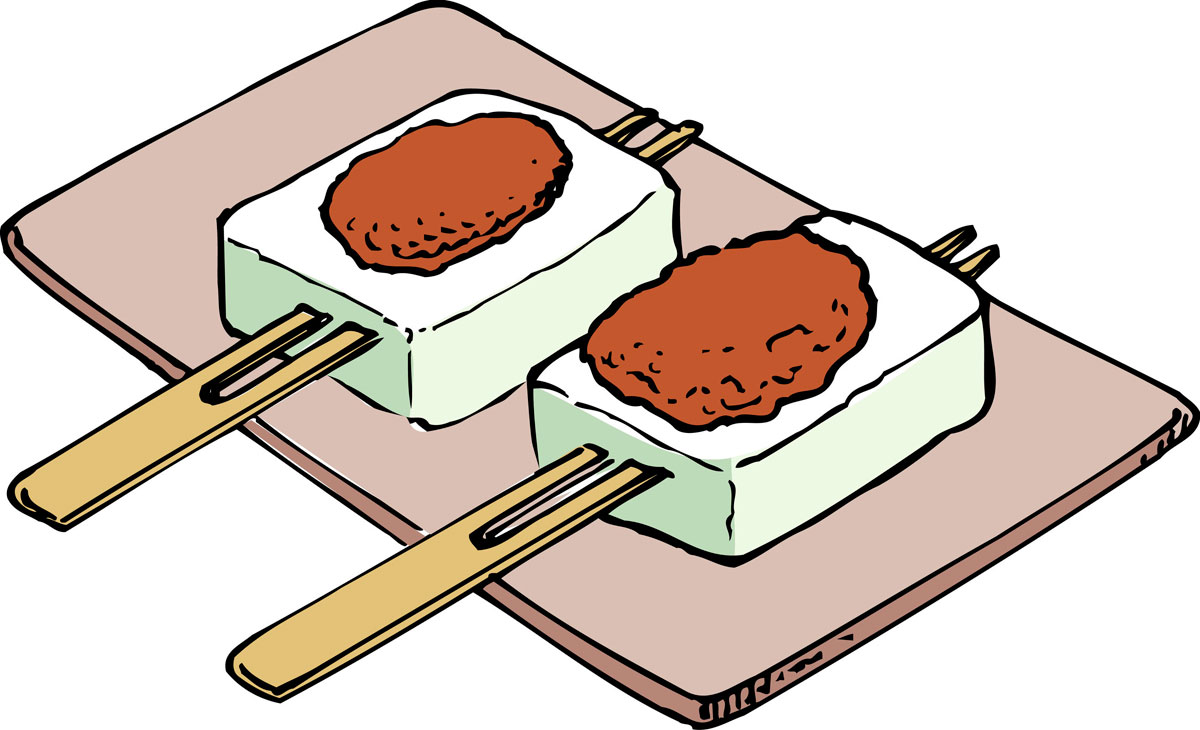
A move to Aichi Prefecture when I lived in Japan prompted a visit to Kikuso, one of the area’s most famous regional-food restaurants. Kikuso’s specialty is dengaku nameshi, a savory combination that has been served since the place opened sometime around 1820. Dengaku is a seductively simple, even primitive, dish, made of small squares of pressed tofu that have been grilled, topped with pungent miso, lightly grilled again, and then garnished with everything from spicy Japanese mustard to poppy seeds. Nameshi is vegetable rice; Kikuso’s is made with chopped, spicy daikon radish leaves, the perfect counterpoint to the dengaku. I have never forgotten Kikuso, nor its incomparable dengaku nameshi.
Dengaku has been around for centuries. It was already being mentioned in shrine diaries in the mid-fourteenth century, and by the Muromachi period (1392-1573) was a well-known dish throughout Japan. Dengaku takes its name from dengaku hoshi (Buddhist priests), who would dress up in colorful costumes and cavort and dance on single stilts during public entertainments and festivals to pray for a good harvest. Two-pronged skewers are traditionally used for grilling dengaku, and these are said to represent the stilts.
By the late seventeenth century, a variation of dengaku appeared that used a root, konnyaku (devil’s tongue), instead of tofu. By the eighteenth century, dengaku was being served throughout the nation at way stations for weary travellers, at tea shops in pleasure quarters, and at post stations. Although dengaku is not an expensive dish, it was considered a delicacy in the Edo period (1603-1867), and was often served with vegetable rice as is done at Kikuso.
By the Meiji era (1868-1912), however, the original version of dengaku had declined somewhat in popularity, and with each subsequent era contemporary variations of the dish were devised. Fish, eggplant, chicken, and sato-imo (field yams) are just a few of the ingredients that replaced tofu in dengaku. Although dengaku is usually eaten by itself as a snack or served as an hors d’oeuvre, the addition of soup, rice, and pickles can make it the main course in a filling lunch or dinner.
Pierce each piece of tofu with either a two-pronged skewer or two skewers so that it won’t fall apart when turned over. (The Japanese traditionally use bamboo skewers.) 2. Make the red miso topping by mixing all the ingredients, with the exception of the ginger. Place the mixture in the top section of a double boiler. Simmer over boiling water, stirring constantly, until the mixture thickens, which takes about 10 minutes. Stir in the ginger. Let the mixture cool prior to spreading it on the tofu. 3. Lightly grill or broil the tofu on both sides until it is slightly browned and hot. Spread a thin layer of miso on one side and grill for a minute or two to heat the miso up. Remove from heat, sprinkle with the desired toppings, and serve immediately, leaving the tofu on the skewers.
When I was a college student in Tokyo, I would often pass mobile food stalls, called yatai, late on blustery winter nights and be completely overwhelmed by the powerful aroma of oden, or Japanese hodgepodge stew. Oden’s pungent smell and taste have made it a perennial favorite with drinkers, no matter the season. It is definitely a comfort food in Japan and can be enjoyed anytime by everyone.
The oden is derived from dengaku–grilled, skewered tofu topped with miso. The dish got its start in the late Edo era (1603-1867) when the people of old Edo (now Tokyo) began cooking many ingredients stuck on bamboo skewers in one pot. They used soy sauce as a base, which accounts for the murky darkness of the stock and the uniformly brownish color of the ingredients. Called Kanto-daki (Kanto-style oden), this dish was passed down to the Kansai area. There the people of Osaka changed the stock, taking out the soy sauce and substituting salt and kelp, or sometimes chicken stock or even white soy sauce, to create a clearer, more delicate broth. The variation, known as Kansai-daki, reached Tokyo and influenced the original oden. In fact, traditional soy sauce-based oden has become a rarity, even in Tokyo.
My version of Kanto-style Oden is slightly unorthodox, as it includes a relatively small amount of processed fish paste products. You are welcome to add as much as you like. The secret to making a great oden? Time (it definitely improves with age), a variety of ingredients, and the all-important condiment, karashi, spicy Japanese mustard. This Kanto-style recipe is just one of the collection of regional dishes featured on Thanks for the Meal.
24ounces (685 grams)daikon radish, unpeeled, cut into 1-inch (2-1/2 cm) rounds, simmered over low heat in water for one hour
5-1/4 ounces (150 grams)fresh shiitake mushrooms, washed, stemmed, and placed on bamboo skewers (three per skewer)
1-1/4 lb. (600 grams) white potato, peeled, and cut in half, simmered in water for 30 minutes and drained
To make Fukuro (stuffed, deep-fried tofu):
5large piecesabura-age (deep-fried tofu), dipped in boiling water for 2 minutes to get rid of excess oil, squeezed to remove excess water, cut in half, then opened to create little sacks
8ounces (225 grams)shirataki (devil’s tongue noodles), cut in half, parboiled, and drained
3raw eggs
108-inch (20cm) longkampyo (dried gourd strips), washed and drained, to tie up the sacks
8ounces (225 grams)konnyaku (devil’s tongue jelly) cut into triangles, parboiled, and drained
2chikuwa (fish paste rolls) cut on the bias into thick slices
1caketofu, drained and cut into 8 thick squares
4-6chicken drumsticks
Assorted cut-up fish paste products such as kamaboko and satsuma-age, optional
Dashi Fish Stock:
1ounce (30 grams)konbu (kelp)wiped with a damp cloth and lightly slashed
8cupswater to soak the kelp in for 30 minutes; retain the water
2small packets (1/5 ounce or 6g) katsuobushi (dried bonito shavings)
Prepared Dashi Stock:
2tbspssake
1/4cuplight soy sauce or to taste
2tbspsmirin (sweet sake) or to taste
2tspssalt or to taste
Condiment:
spicy Japanese mustard (karashi) to taste
Instructions
Place the kelp and water into a soup pot over medium heat. Just before it boils, take out the kelp (which can be cut up and added to the oden) and add the bonito shavings. Boil for a minute or two, then strain. Return the stock to a clean soup pot. Add the remaining stock ingredients, adding salt little by little until the flavor is to your liking. Keep the pot simmering.
To make fukuro, carefully stuff each pocket with either shirataki, pounded rice cake, or a shelled raw egg. Tie each pocket up with a dried gourd strip.
To make oden, place all the ingredients into the simmering prepared stock and cook for at least one hour. Bring the pot to the table and serve communally. Place a selection of the cooked ingredients in shallow bowls, serving the fiery mustard separately. If refrigerated, oden will be even tastier the second day. Reheat, adding more ingredients if desired, and serve.
My recipes may include affiliate links, so without costing you anything extra, I’ll earn a small percentage of the sales if you purchase these items through these links. Thank you for your support!
Leave a note in the comments section (see below) if you make this dish!
Get FREE Japanese Recipes by Email! Sign Up Now!
Get Lucy’s ebook, “How to Make Traditional Japanese Salad Dressings” FREE when you subscribe.
Last year, my daughter’s Japanese teacher at the local high school asked me to teach about 40 kids how to make yakisoba. So one early morning, we crammed into the very small ‘parent’s’ kitchen, set up a number of different stations with electric frying pans, and cooked away. There wasn’t a leftover in sight, and it was a lot of fun. Not only is this a deliciously seductive recipe, but it is very easy to make and a great way to get kids to eat a lot of vegetables painlessly!
Like any country, Japan has its traditional snack foods. Some of the tastiest can be sampled in the mobile food stalls known as yatai, found at public events, traditional theater, festivals, and fairs – especially at evening cherry blossom-viewing parties in April – and on many a street corner at night.
The origins of yatai with prop-up roofs and plastic sheeting “walls” against the worst of the weather can be traced back to the early 1700s. A more primitive version, called a suburi yatai, which sold not only foodstuffs but also basic goods and fuel, dates from 1613, in the early Edo period (1603-1867). After a major earthquake in Edo (Tokyo) in 1700, these stalls started to sell dengaku (grilled tofu topped with sweetened miso), a cheap dish popular with traveling samurai as well as locals. Particularly in the aftermath of natural disasters and during other times of famine, yatai came into their own; the government regularly attempted to ban them, claiming that they caused too many fires or disturbed the peace, but by the eighteenth century they were all the rage, reaching a heyday in the 1780s. While early yatai had sold only dried, grilled, or boiled fish, vegetables, and a variety of desserts, by the 1780s they were offering everything from candy to tenpura.
One of the most popular types of yatai food since the 1700s has been late-night soba (buckwheat noodle) snacks, known in those days as yotaka soba. A yotaka is a nighthawk, but it can also refer to a prostitute, and ladies of the night often ate soba at yatai after a hard evening’s work. The food being cheap but delicious, it was not uncommon for yotaka women to meet some of their customers also enjoying a restorative bowl of noodles before strolling home. Even now, office workers and students studying late into the night drop in at a yatai for midnight feasts of ramen (Chinese noodles).
Yakisoba (Japanese-style chow mein) is another typical yatai recipe. Although Chinese noodles are used, the dish is entirely Japanese in origin, and has been sold at yatai in Tokyo since the late 1930s. It is thought to have developed as a variation on okonomiyaki, a pancake topped with vegetables and meat or fish and slathered with a sweet, thick sauce, which has been served at yatai since the Edo period. (See my Okonomiyaki recipe: www.thanksforthemeal.net/okonomiyaki)
Addictive and filling, like many other yatai foods, yakisoba is very easy to make at home. For an informal party, use a large electric frying pan and cook at the dining table.
This post may include affiliate links, so without costing you anything extra, I’ll earn a small percentage of the sales if you purchase these items through these links. Thank you for your support!
8fl oz ready-made yakisoba or okonomiyaki sauce (if unavailable, use equal parts of Worcestershire sauce and ketchup) (240 ml)
Garnish:
Aonori:seaweed flakes to taste
Beni shoga:red pickled ginger to taste
Instructions
In a wok, deep frying pan, or large electric pan, sauté the onion and cabbage in the oil over medium heat until slightly soft. Add the ground beef and black pepper to taste. Cook, stirring constantly, until the beef begins to change color. Then add the noodles, separating the strands a little with your fingers as you put them in the pan. Continue to cook, stirring, for a few moments.
Finally pour in the water, then the yakisoba sauce, and mix well.
Serve on individual plates, passing the seaweed and pickled ginger separately to sprinkle over the noodles.


 sells a wide variety of Japanese teas, from Matcha, Sencha, Gyokuro to Soba Cha, Oolong, to Houjicha and so on.


 Making rice the proper way is an art in Japan, one that often takes many years to perfect. The importance of this is reflected by the overwhelming number of Japanese meals that end with a bowl of pearlescent, impeccably cooked short-grain white rice, pickles, and miso soup. Rice’s versatility doesn’t stop there, of course. One common variation is the vinegared rice used for sushi; another is the glutinous rice used to make sekihan (red rice) for celebrations.
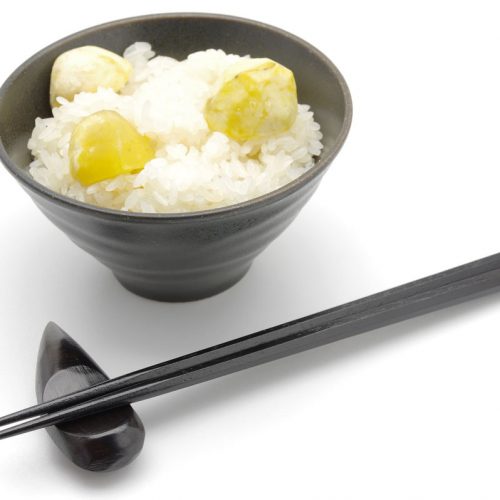

 I recently returned to Japan for a long-planned for visit after a 25 year absence. Really?! It just never felt like it had been that long, probably because a part of my heart has always resided in Japan—ever since I first visited its shores when I was 15 years old. But this trip was a little different and very special; for I was joined by my teenage daughter for her high school graduation present. This was her first trip to Japan and I don’t know who was more excited to go there! We planned the details of this trip for months and months, consuming a lot of homemade Japanese dinners, and watching endless vlogs on Japan that my daughter discovered in the process.


 Portuguese and Spanish missionaries started trickling into Japan to spread the teachings of Christianity near the end of the Muromachi era (1392-1567), and their first foothold in Japan was
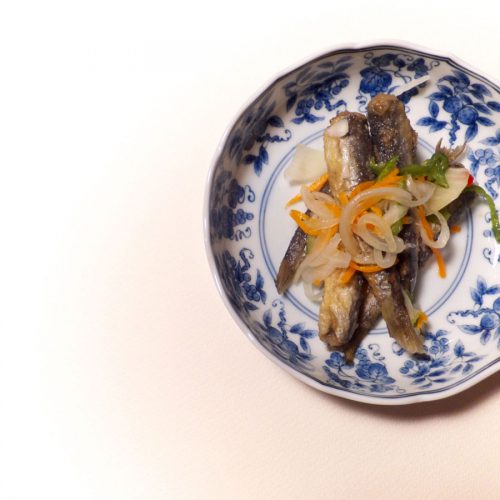


 Miso (fermented soybean paste) is not only considered a condiment, spice, and seasoning in Japan but a way of life as well. I can think of no equivalent food in Western cuisine that has had such a powerful impact on culinary culture, not to mention societal relations.


 Walk out of almost any train station in Japan in the evening, look for a restaurant with an akachochin (red lantern) outside, and inside you’ll find groups of salaried workers talking, drinking, and consuming countless skewers of yakitori, this country’s version of shish kebab. There is something very seductive about the smell of meat grilling over charcoal, which may help to explain the nation’s enduring love of yakitori.


 A move to Aichi Prefecture when I lived in Japan prompted a visit to Kikuso, one of the area’s most famous regional-food restaurants. Kikuso’s specialty is dengaku nameshi, a savory combination that has been served since the place opened sometime around 1820. Dengaku is a seductively simple, even primitive, dish, made of small squares of pressed tofu that have been grilled, topped with pungent miso, lightly grilled again, and then garnished with everything from spicy Japanese mustard to poppy seeds. Nameshi is vegetable rice; Kikuso’s is made with chopped, spicy daikon radish leaves, the perfect counterpoint to the dengaku. I have never forgotten Kikuso, nor its incomparable dengaku nameshi.


 When I was a college student in Tokyo, I would often pass mobile food stalls, called yatai, late on blustery winter nights and be completely overwhelmed by the powerful aroma of oden, or Japanese hodgepodge stew. Oden’s pungent smell and taste have made it a perennial favorite with drinkers, no matter the season. It is definitely a comfort food in Japan and can be enjoyed anytime by everyone.


 Last year, my daughter’s Japanese teacher at the local high school asked me to teach about 40 kids how to make yakisoba. So one early morning, we crammed into the very small ‘parent’s’ kitchen, set up a number of different stations with electric frying pans, and cooked away. There wasn’t a leftover in sight, and it was a lot of fun. Not only is this a deliciously seductive recipe, but it is very easy to make and a great way to get kids to eat a lot of vegetables painlessly!