Tag: ginger

  • Japanese Curry Rice Recipe

    As much a part of the national food culture as sushi, various types of curry served with white rice (Kare Raisu, カレーライス) has been an enduring favorite in Japan since the Meiji era (1868-1912). Known as “curry rice” or “rice curry”, these days they usually contain meat or poultry, potatoes, carrots, and onions. Unlike Indian curries, however, for which the spice mixture is created fresh each time, the Japanese dish uses curry powder (such as S & B Oriental Curry Powder) – which came from Britain and was first sold in Japan in 1930 – with flour as a thickener.

    Japanese Curry Rice

    Curry Rice: The Ideal Meal?

    It is a big family favorite here (my daughter often replaces the chicken with firm tofu and even adds in fresh shiitake mushrooms sometimes) and a great addition to your culinary repertoire. Fast, easy, savory, and delicious…what more do you want in a weekday meal?! Be warned: Japanese curry can be thicker than you may be used to and not ultra-spicy (unless you use one of the ready-made ‘hot’ curry roux packs) but it has a very alluring flavor and my biggest suggestion is to make double the amount to have some extra in the freezer or for another meal!

    The earliest curry recipes are found in two cookery books published in 1872. Seiyo Ryori Shinan (A Guide to Western Cooking), written by the owner of a bookstore called Keigakudo, featured a recipe for frog curry quite unlike any curry eaten in Japan today. As well as frog meat, it included leeks, shrimp, garlic, ginger, butter, salt, flour, and curry powder, and was boiled for one hour. One can only wonder about the taste! Later in the same year, the first chicken curry recipe appeared in Seiyo Ryori Tsu (The Western Cooking Expert) by the noted journalist, Robun Kanagaki.

    The Origin of Curry Rice

    Curry rice’s real popularity can be traced back to the Japanese military, which began serving it at the end of the Meiji era and the beginning of the Taisho era (1912-26). It was considered the ideal meal, using only one bowl yet incorporating rice, vegetables, and meat. It also became popular in rural areas during harvest time, being easy to make, substantial, and cheap. Nowadays, a whole range of instant curry roux (with varying levels of spiciness) is part of Japanese life, and curry remains a perennial favorite for take-out, restaurants, and for the home cook.

    If you make this recipe and love it, please come back and give it a 5-star rating ⭐⭐⭐⭐⭐ It helps others find the recipe! ❤️ Above all, I love to hear from you. Then snap a photo and tag me on Instagram! I would love to see your creation.

    Japanese chicken curry recipe

    Japanese Curry Rice Recipe

    Lucy Seligman
    5 from 1 vote
    Course Main Course
    Cuisine Japanese
    Servings 4

    Ingredients
      

    • 3 tbsp neutral oil
    • 3 tbsp unsalted butter
    • 2 large cloves garlic, peeled and grated
    • 1/2 tbsp fresh ginger, peeled and grated
    • 2 medium onions, peeled and thinly sliced
    • 4 tbsp Japanese curry powder (such as Oriental S & B Curry powder), or to taste
    • 4 tbsp white flour
    • 5-1/2 cups unsalted chicken stock
    • 1 small red apple, peeled and finely grated (grate just before using to prevent discoloration)–I used Fuji
    • 2 bay leaves
    • 1 tbsp tomato ketchup
    • Salt and black pepper to taste
    • 1.5 lbs skinless, deboned chicken thighs or breast, cut into large bite-sized pieces
    • 3 medium potatoes, peeled and cut into large bite-sized pieces
    • 2 carrots, peeled and cut into large bite-sized pieces
    • 1 large onion, peeled and cut into eighths (wedges)
    • 1 tbsp soy sauce, or to taste
    • Cooked & hot Japanese white rice

    Optional Garnishes:

    • Rakkyo pickles ( a type of Japanese shallot)
    • Kizami pickled ginger
    • Fukujinzuke relish

    Instructions
     

    • In a deep frying pan, heat 2 tablespoons of oil and 2 tablespoons of butter. Sauté the garlic and ginger briefly, then add in the sliced onions and sauté over medium heat, stirring, until brown – about 20 minutes. (Note: Caramelizing the onions adds another layer of flavor and depth to your curry.)
       
    • Next add in 2 tablespoons of curry powder, sauté briefly, then add the flour and sauté for a few minutes more, stirring constantly, until well combined. Little by little, add in the chicken stock, stirring continuously, to make a thick roux, and bring to a boil. Add in the grated apple, bay leaves, and ketchup, and simmer for 15-20 minutes, or until the sauce thickens. Remove any scum.
       
    • Meanwhile, salt and pepper the chicken. In another pan, heat the remaining oil and butter, and sauté the chicken until it becomes brown on both sides.
    • When the sauce is ready, remove the bay leaves, add in the chicken, vegetables, salt, and pepper to taste, 2 more tablespoons of curry powder (or more if you want), and the soy sauce. Cook, covered, over medium heat for 25 minutes, stirring occasionally. Meanwhile, cook or reheat the rice. Adjust the curry seasoning to taste and serve hot over rice. Pass the garnishes separately.

    Notes

    It is a matter of personal preference how thick you like the roux. In Japan, it can be anywhere from very thin and watery to very thick, especially if you decide to use ready-made roux. This recipe is in the medium thickness range. Play with it and see what variation you like. It is a very forgiving recipe!
    Keyword chicken
    Tried this recipe?Let us know how it was!

    Get FREE Japanese Recipes by Email! Sign Up Now!

    Japanese salad dressing recipes
    .
  • Rafutei: Okinawa’s Slow-Simmered Pork

    Rafutei: Okinawa’s Slow-Simmered Pork

    Rafutei

    I was lucky enough to visit Okinawa once and loved it! Here is one of my favorite recipes from there.

    Modern Okinawa cuisine is based on dishes enjoyed by the rulers of the Ryukyu dynasty, which controlled Okinawa from 1372 to 1879, and traditional island homecooking.

    Originally, royal Ryukyuan cuisine was served only during special events and ceremonial occasions. It was gorgeous fare, richly laid out in the style of a Chinese banquet, and dramatically presented on exotic black and red lacquerware. When the dynasty eventually collapsed, and Okinawa became a prefecture of Japan, most of this sumptuous formal cuisine disappeared with it. But some dishes were adapted to fit the budgets and tastes of ordinary folk. The passage of time has made it difficult to find the culinary seam between royal and traditional cooking.

    Okinawa’s proximity to China and the Ryukyu’s dynasty’s close ties with the Middle Kingdom are reflected in Okinawa’s overwhelming preference for pork – it’s estimated that there are over 150 pork dishes in Ryukyuan cooking. Other similarities include an abundance of dishes stir-fried in the Chinese fashion, the often heavy-handed use of oil and salt, and the pungent presence of plenty of garlic. Because of its hot, humid climate, many of Okinawa’s dishes are also preserved, using such techniques as slow boiling and braising in sweetened soy sauce. One of these is rafutei, which is also one of Okinawa’s most popular pork dishes. Rafutei’s origins are uncertain, but written records give the original name for the dish as rafutai-ni, so it is likely that it came from China.

    Rafutei can be cooked in either a soy or miso-based sauce. My recipe is soy-based. The important thing is that the meat is boiled for a long time, the aim of which is to create a meltingly tender mixture of meat and fat, but without the fattiness. In Nagasaki, they make a similar pork dish called kaku-ni. Kaku-ni is also braised in sweetened soy sauce, but it is cooked for an even longer period than rafutei, resulting in even greater tenderness.

    If you like this, check out the other regional Japanese recipes >>>

    Rafutei

    Rafutei

    Lucy Seligman
    No ratings yet
    Course Main Course
    Cuisine Japanese
    Servings 6

    Ingredients
      

    • 2-1/4-2-1/2 lbs boneless pork belly, ideally with three layers each of meat and fat
    • 1-1/4 cups Awamori, an Okinawan liquor distilled from rice, or good quality sake
    • 1-1/4 cups dashi fish stock
    • 1/3 cup white sugar
    • 1/3 cup Japanese soy sauce
    • 1 small knob of fresh ginger, peeled and thickly sliced, optional

    Garnish:

    • Bok choy, spinach, choc (sometimes also called choy) sum or fresh nigauri* (bitter melon/bitter gourd)

    Instructions
     

    • Place the port in a deep, thick-bottomed soup pot, fill the pot three-quarters full with water, and bring to a boil. Cover, and continue boiling over medium heat for one hour, occassionally skimming off any scum. (If too much water boils off and the pork is not completely covered, add more boiling water.) Remove pork from heat, and cool down enough to cut into 1-1/2 inch chunks.
    • Prepare the seasoning stock by combining all ingredients and putting them in the cleaned soup pot. Bring the mixture to a boil, add the pork, and simmer for two and a half hours, turning the pork chunks over about once every 30 minutes. Halve the bok choy and boil briefly.
    • Lay the bok choy (or other green garnish) in a serving dish. Place the pork chunks next to it and drizzle the remaining sauce over. Serve hot or at room tempurature.
    • *If fresh nigauri is available, by all means use it! It can replace the bok choy and or other greens. To prepare nigauri, scrape the skin, slice thinly, remove the seeds, and blanch to
      remove the bitterness. It can also be lightly stir-fried.


    Tried this recipe?Let us know how it was!

    Do you have Lucy’s cookbook yet?

    Osechi cookbook New Year Seligman
    Leave a note in the comments section and let me know if you made this recipe and how it turned out!


    Get FREE Japanese Recipes by Email! Sign Up Now!

    Japanese salad dressing recipes
    .
  • Katsuo no Tataki: Seared Bonito Sashimi with Garlic

    Katsuo no Tataki: Seared Bonito Sashimi with Garlic

    katsuo no tataki Seared Bonito Sashimi with Garlic

    Katsuo (Bonito) is a seasonal Japanese delicacy of early summer. The most popular way to eat it is as katsuo no tataki (“pounded bonito sashimi”), a traditional dish from Kochi Prefecture on Shikoku Island. (Part of Thanks for the Meal’s regional Japanese recipe collection.)

    This is a unique type of sashimi, the only kind to be eaten with garlic or seared before eating. In the past the bonito was pounded to soften the flesh, but nowadays condiments are rubbed into it and it is left to marinate so that it softens and absorbs their flavor. It is a perfect dish to make when the weather is hot and sultry, and when you don’t want to spend too much time in the kitchen.

    The origins of the dish are lost in the mists of time. One Edo-era (1603-1867) story holds that a European merchant tried to make smoked katsuo no tataki. According to another story, also of the Edo era, a European priest, homesick for beefsteak and garlic, used bonito as the closest red meat substitute.

    AbeBooks.com. Thousands of booksellers - millions of books.

    Need books?

    I’m buying mine from Abe Books now in an effort to support smaller businesses. They have new and used options and harder to find books, including all of my favorite Japanese cookbooks! You can support Thanks for the Meal by clicking on this banner to buy your books.

    Arigatou Gozaimasu / ありがとうございますいます –Lucy

    Whatever the origins of the recipe, during the Edo era katsuo was so cherished that the Edokko – the people of Edo – used to say that in order to be able to afford hatsu-gatsuo, the first bonito of the season, they would willingly pawn their wives. Bonito first became popular with the samurai, since the word “katsuo” can also mean “winning man,” but it later spread to the common people.

    There are many ways to enjoy bonito in Japan, but perhaps the most traditional, besides katsuo no tataki, is as dried shavings. Known as katsuobushi, these are a basic ingredient in Japanese fish stock, dashi.


    Get FREE Japanese Recipes by Email! Sign Up Now!

    Japanese salad dressing recipes
    .

    My recipes may include affiliate links, so without costing you anything extra, I’ll earn a small percentage of the sales if you purchase these items through these links. Thank you for supporting Thanks for the Meal!

    bonito sashimi

    Katsuo no Tataki: Seared Bonito Sashimi with Garlic

    Lucy Seligman
    5 from 1 vote
    Course Main Course
    Cuisine Japanese
    Servings 4

    Ingredients
      

    • 1 lb fresh bonito fillets with skin intact*, may replace with yellowtail or tuna
    • Salt
    • Large bowl of ice water
    • Homemade or bottled Ponzu dipping sauce, a vinegary mixture of soy sauce and sudachi or yuzu, types of Japanese citron

    Condiments**:

    • 5 tbsps or more minced or chopped garlic
    • 5 tbsps or more minced scallion
    • 3 tbsps or more grated fresh ginger
    • 1/2 cup fresh shiso (perilla) leaves, cut into slivers

    Garnishes (optional)

    • Whole shiso leaves
    • Kaiware (radish sprouts)
    • Edible flowers

    Instructions
     

    • Combine the condiments in a small bowl and set aside.
    • If using unseared bonito: Cut away any very dark parts of the bonito. Wash and pat dry. Spread out the fish and insert skewers–long metal ones are easiest to remove–parallel or fanning out to support the whole fillet. Sprinkle lightly with salt. Omit this step if you have bought seared bonito.
    • Quickly sear both sides of the fillets evenly over a very high heat. The outside of the bonito should turn white; the inside should look like rare steak. Omit this step if you have bought seared bonito.
    • Remove from the heat and plunge immediately into ice water. Gently remove the skewers by twisting them. Pat dry. Place the fillets on a cutting board, skin side up, and cut into 1/2-inch-thick slices.
    • Decorate a serving platter with the bonito slices, overlapping them in rows. Add a thick layer of the condiment mixture, patting down firmly, and drizzle liberally with ponzu sauce. Cover with plastic wrap and refrigerate for 3 to 4 hours.
    • Just before serving, remove from the refrigerator and take off the plastic wrap. Garnish if desired. Serve additional ponzu sauce in individual bowls, adding extra condiments if you like.

    Notes

    *I was able to buy already seared bonito at my local Japanese market here in the Bay area. It made for a faster preparation for this dish.
    **If desired, make additional condiment mixture to mix into ponzu sauce at the table while dining.
    Tried this recipe?Let us know how it was!

    Leave a note in the comments section and let me know if you made this recipe and how it turned out!


    Do you have Lucy’s cookbook yet?


  • Tofu: Skewered, Grilled, and Garnished (Part 1)

    Tofu: Skewered, Grilled, and Garnished (Part 1)

    Tofu Dengaku
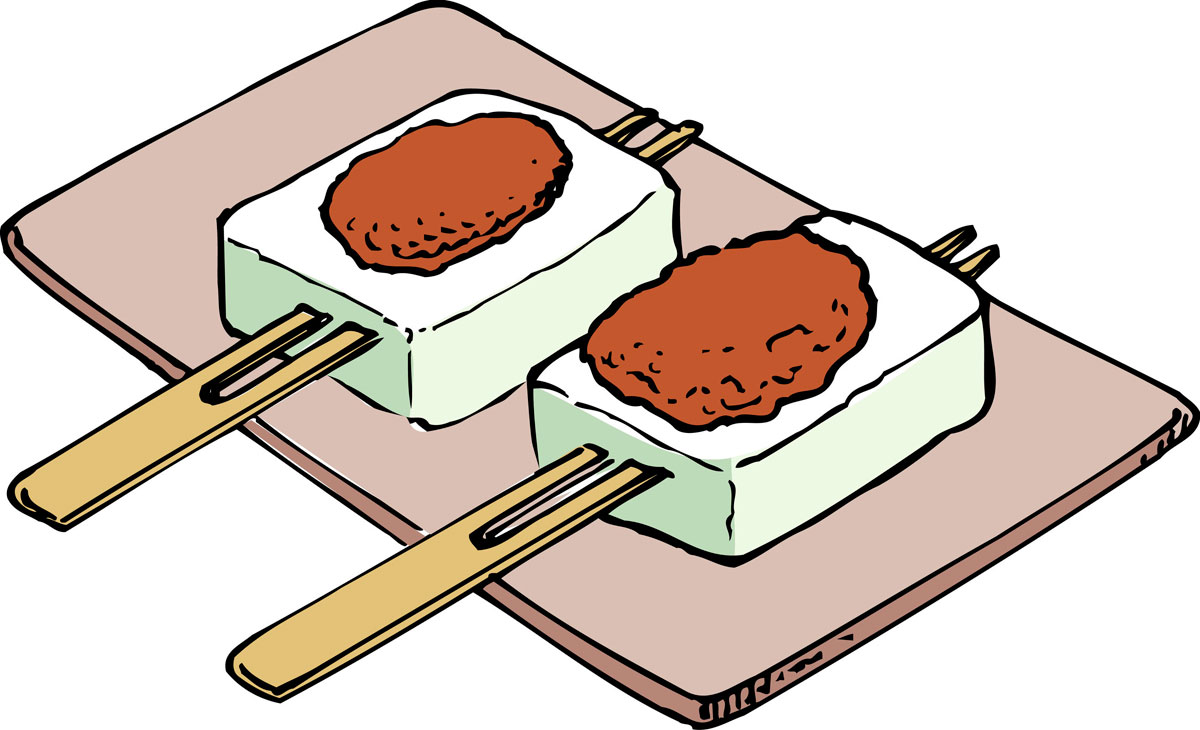
A move to Aichi Prefecture when I lived in Japan prompted a visit to Kikuso, one of the area’s most famous regional-food restaurants. Kikuso’s specialty is dengaku nameshi, a savory combination that has been served since the place opened sometime around 1820. Dengaku is a seductively simple, even primitive, dish, made of small squares of pressed tofu that have been grilled, topped with pungent miso, lightly grilled again, and then garnished with everything from spicy Japanese mustard to poppy seeds. Nameshi is vegetable rice; Kikuso’s is made with chopped, spicy daikon radish leaves, the perfect counterpoint to the dengaku. I have never forgotten Kikuso, nor its incomparable dengaku nameshi.

    Dengaku has been around for centuries. It was already being mentioned in shrine diaries in the mid-fourteenth century, and by the Muromachi period (1392-1573) was a well-known dish throughout Japan. Dengaku takes its name from dengaku hoshi (Buddhist priests), who would dress up in colorful costumes and cavort and dance on single stilts during public entertainments and festivals to pray for a good harvest. Two-pronged skewers are traditionally used for grilling dengaku, and these are said to represent the stilts.

    By the late seventeenth century, a variation of dengaku appeared that used a root, konnyaku (devil’s tongue), instead of tofu. By the eighteenth century, dengaku was being served throughout the nation at way stations for weary travellers, at tea shops in pleasure quarters, and at post stations. Although dengaku is not an expensive dish, it was considered a delicacy in the Edo period (1603-1867), and was often served with vegetable rice as is done at Kikuso.

    By the Meiji era (1868-1912), however, the original version of dengaku had declined somewhat in popularity, and with each subsequent era contemporary variations of the dish were devised. Fish, eggplant, chicken, and sato-imo (field yams) are just a few of the ingredients that replaced tofu in dengaku. Although dengaku is usually eaten by itself as a snack or served as an hors d’oeuvre, the addition of soup, rice, and pickles can make it the main course in a filling lunch or dinner.

    Tofu Dengaku

    Tofu Dengaku

    Lucy Seligman
    No ratings yet
    Servings 4

    Ingredients
      

    • 2 blocks fresh momen (cotton) tofu

    Red miso topping:

    • 1/2 cup red hatcho miso
    • 2 tbsps white miso
    • 1 egg yolk
    • 1 tbsp sake
    • 2 tbsps mirin (sweet sake)
    • 4 tbsps white sugar
    • 1/4 cup dashi fish stock
    • 2 tbsps water
    • 1/2 tsp grated ginger (or to taste)

    Garnishes (choose any three):

    • Japanese mustard (karashi)
    • Ground Japanese pepper (sansho)
    • Sprigs of fresh Japanese pepper (kinome)
    • Slivers of fresh Japanese citron (yuzu)
    • White poppy seeds
    • Toasted white sesame seeds
    • Toasted black sesame seeds

    Instructions
     

    • Pierce each piece of tofu with either a two-pronged skewer or two skewers so that it won’t fall apart when turned over. (The Japanese traditionally use bamboo skewers.)
      2. Make the red miso topping by mixing all the ingredients, with the exception of the ginger. Place the mixture in the top section of a double boiler. Simmer over boiling water, stirring constantly, until the mixture thickens, which takes about 10 minutes. Stir in the ginger. Let the mixture cool prior to spreading it on the tofu.
      3. Lightly grill or broil the tofu on both sides until it is slightly browned and hot. Spread a thin layer of miso on one side and grill for a minute or two to heat the miso up. Remove from heat, sprinkle with the desired toppings, and serve immediately, leaving the tofu on the skewers.
    Tried this recipe?Let us know how it was!

    Photo attribution: Copyright: paylessimages / 123RF Stock Photo

    Leave a note in the comments section (see below) if you make this dish!

    tofu Dengaku

    Get FREE Japanese Recipes by Email! Sign Up Now!

    Japanese salad dressing recipes
    .
  • Delicious Tenpura Recipe (Tempura)

    Tempura recipe
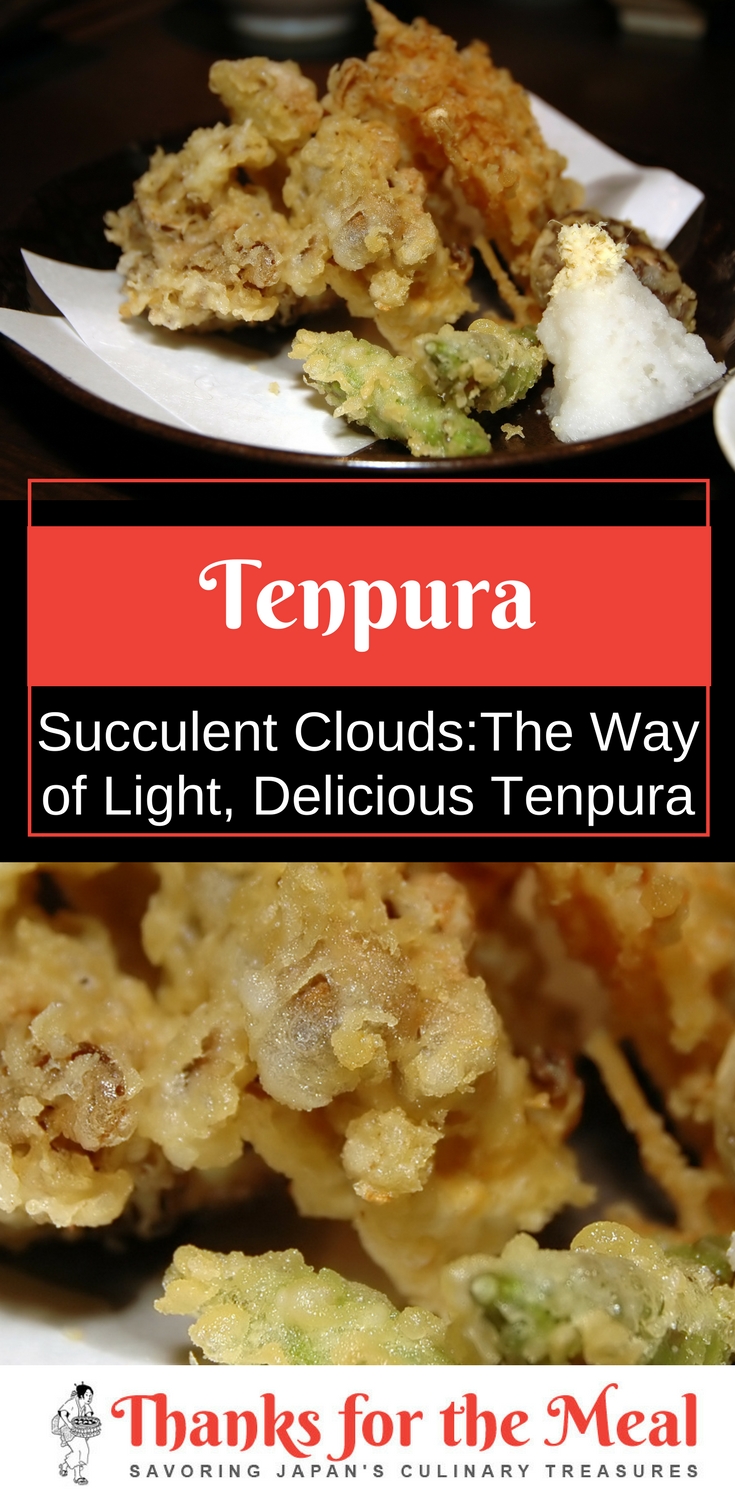
With a light, crispy, oil-free coating enveloping a perfectly cooked and succulent piece of seafood or vegetable, tenpura (also written tempura) is considered a quintessentially Japanese food. Both the word and the dish, however, are almost certainly of foreign origin. The source: Spanish and Portuguese missionaries called nanbanjin (southern barbarians) who came to Japan to convert the heathen masses toward the close of the sixteenth century. Prohibited from consuming meat on Fridays, they substituted batter-fried fish.

    There are several theories on where the name came from. Templo, meaning temple or church in Spanish, and tempero, which in Portuguese means cooking, are two possible roots. The Chinese characters can also be read as follows: ten meaning up, pu for flour, and ra for thin silk, the latter most likely a reference to the thin coating of batter.

    By the middle of the Edo era (1603-1867), tenpura, inexpensive and considered relatively low-class, was a popular offering at open-air food stalls. Only in recent years has the dish risen in both price and public esteem to its exalted culinary status in high-class establishments. With a little preparation and practice, it is surprisingly easy to make equally good tenpura at home. Keep the oil at a constant temperature; use ice-cold water to make the batter; and, perhaps most important of all, leave the batter lumpy.

    Tempura recipe

    Tenpura

    Lucy Seligman
    No ratings yet
    Course Main Course
    Cuisine Japanese
    Servings 4

    Ingredients
      

    • 8 medium or 4 large shrimp washed, shelled, and deveined, with tails slightly trimmed
    • 4 small kisu Japanese whiting fillets (or other small white-fleshed fish), washed and with tails left intact
    • 4 fresh shiitake mushrooms trimmed
    • 4 thick rounds of sweet potato peeled
    • 4 shiso perilla leaves, washed and patted dry
    • 2 Japanese eggplants trimmed and halved lengthwise, with skin lightly scored for quicker frying
    • 4 string beans trimmed and halved lengthwise
    • Sesame oil and vegetable oil for deep-frying half and half is best
    • Dipping Sauce:
    • 1 cup dashi fish stock
    • ¼ cup low-sodium soy sauce
    • ¼ cup mirin sweet sake
    • ¼ cup sake
    • Dash of salt
    • 1 cup daikon radish peeled, grated, and drained
    • 4 teaspoons fresh ginger peeled & grated
    • Lemon wedges & coarse salt optional
    • Batter: Double quantity if necessary
    • 1 large egg
    • 1 cup ice water
    • 1 cup all-purpose white flour sifted

    Instructions
     

    • Prepare the shrimp and other items as instructed above, then place them on a large plate. Bring the dipping sauce ingredients to a boil in a pan, stirring well; remove from heat and pour into four small serving bowls. Let cool. Put the daikon radish, ginger, and lemon (if used) in separate bowls. Prepare a rack for draining the tenpura, and line your serving plates with paper napkins.
    • While you are heating the oil in a wok or other large large, deep-sided pot, lightly mix the egg and ice water in a bowl. Add the flour all at once, stirring only briefly with chopsticks or a fork to create a lumpy, nonsticky batter. Place the bowl of batter in a large bowl filled with ice water near the stove. When a dab of batter is dropped into the oil and rises to the surface and sizzles, the oil is ready.
    • Fry the fish first. Dip them briefly in the batter and then drop into the oil, use
      cooking chopsticks to turn them rapidly.
    • (To preserve their delicate flavor, the perilla leaves should be dipped on their "back" side only.) Then proceed with the other items. If space permits, fry all similar items together. The tenpura is ready when it turns golden brown and floats. I like to drain tenpura using a cooling rack placed over a cookie sheet for easy clean up.
    • Remove any excess fried batter with a slotted spoon.
    • Tenpura should be served immediately and eaten piping hot. It could also be made at the dining room table by the guests, using fondue pots. Dip into the sauce, add grated radish and ginger as desired, or sprinkle with lemon and dip lightly in salt.
    Tried this recipe?Let us know how it was!

    tenpura recipe

    Get FREE Japanese Recipes by Email! Sign Up Now!

    Japanese salad dressing recipes
    .
  • The Art of Ramen: Basic Chicken Stock For Ramen

    The Art of Ramen: Basic Chicken Stock For Ramen

    This is a simple yet delicious stock base to make for any of your Ramen recipes. If you want to try other bases for the stock you can use cracked pork bones (for a richer stock) and even shelled short-necked clams. You can also quickly sauté the clams in sesame oil for a lighter stock or mix these with the chicken to create a different tasting stock.

    This is one of five recipes in the “Art of Ramen” series.

    Ramen chicken stock

    The Art of Ramen: Basic Chicken Stock For Ramen

    Lucy Seligman
    4.50 from 2 votes

    Ingredients
      

    • 1 chicken carcass or 7 ounces chicken wings cleaned**
    • 1 Japanese leek negi, cut in half
    • 1 medium-sized onion peeled and halved
    • 1 medium-sized carrot peeled and halved
    • 1 large knob ginger peeled and halved
    • 3 to 4 egg shells***
    • 7-1/2 cups water

    Instructions
     

    • Place all ingredients in a soup pot. Bring to a boil, lower heat to a high simmer, and cook, covered, for two to three hours, skimming of the scum occasionally. Strain the stock using a cheesecloth-lined colander; pressing down on the remaining ingredients with the back of a large wooden spoon to release all the flavor. If not used immediately, cool and freeze the stock until needed.

    Notes

    *This recipe can be easily doubled or tripled to yield enough stock for 10 to 15 servings. The stock can be frozen for later use. One serving is 1-1/4 cups.
    **Cracked pork bones (for a richer stock) and even shelled short-necked clams, quickly sautéed in sesame oil (for a lighter stock) can replace or be mixed with the chicken to create a different tasting stock.
    ***The egg shells help to kill the smell of the carcass and/or bones, and to absorb some of the scum.
    Tried this recipe?Let us know how it was!
    Basic Chicken Stock For Ramen
     

    Want More Ramen Recipes?

    Check out the Art of Ramen post with the history or ramen, ramen cooking tips, and all 5 reciepes in the Art of Ramen series:


    Get FREE Japanese Recipes by Email! Sign Up Now!

    Japanese salad dressing recipes
    .
  • The Art of Ramen: Soy Sauce Flavoring for Ramen Soup

    The Art of Ramen: Soy Sauce Flavoring for Ramen Soup

    This is a traditional, yummy and simple Soy Sauce flavoring for Ramen noodles.

    This is part of the “Art of Ramen” series. The basic chicken stock for ramen that’s used in this recipe is also part of this series.

    Ramen noodles

    Soy Sauce Flavoring for Ramen Soup

    Lucy Seligman
    No ratings yet

    Ingredients
      

    • 2 large garlic cloves peeled
    • 2 knobs ginger peeled
    • 1 Japanese leek white part only
    • 4 tablespoons mirin sweet sake
    • ½ cup + 2 tablespoons low-sodium soy sauce
    • ¼ cup + 2 tablespoons sake
    • 5 cups strained chicken stock

    Instructions
     

    • Mash the garlic, ginger and leek together. Mix together the mirin, soy sauce and sake. Add all the ingredients to a small saucepan and let cook slowly, over low heat, for five minutes. Combine the soy sauce flavoring with hot stock.
    • Place garnishes on top of the cooked noodles in the soy sauce flavored soup. Add ½ teaspoon lard to each serving and serve piping hot.

    Notes

    Garnishes:
    Manchurian wild rice stems, (menma or shinashiku) to taste
    4 slices fishcake (naruto)
    8 leaves parboiled and trimmed spinach, cut into thirds
    2 teaspoons lard
    Minced green onion or Japanese leek to taste
    Tried this recipe?Let us know how it was!

    Soy Sauce Flavoring for ramen

    Want More Ramen Recipes?

    Check out the Art of Ramen post with the history or ramen, ramen cooking tips, and all 5 reciepes in the Art of Ramen series:


    Get FREE Japanese Recipes by Email! Sign Up Now!

    Japanese salad dressing recipes
    .
  • The Art of Ramen: Barbecued Pork (Chashu) For Ramen

    The Art of Ramen: Barbecued Pork (Chashu) For Ramen

    Ramen noodle

    Barbecued Pork (Chashu) is just one of the many traditional garnishes used for Ramen.  It is surprisingly easy to make and has a very seductive taste and smells divine!  When I make this, there are never any left-overs! Chashu’s origins come from the Chinese Cantonese barbecue pork dish called Char siu.

    This is part of the “Art of Ramen” series which includes chicken stock, salt flavoring, Sapporo-style spicy miso flavoring, soy sauce flavoring,  and the history of ramen.

    Ramen noodles

    Barbecued Pork* (Chashu) For Ramen

    Lucy Seligman
    No ratings yet

    Ingredients
      

    • 21 ounces 600g pork top leg or shoulder roast**
    • ½ Japanese leek white part only
    • 2 large cloves garlic peeled
    • 1 large knob ginger peeled
    • 6 tablespoons low-sodium soy sauce
    • 3 tablespoons white sugar
    • 3 tablespoons sake
    • ¼ teaspoon salt
    • ¼ teaspoon coarsely cracked black pepper

    Instructions
     

    • Cut the pork lengthwise, and lightly slash the meat with a sharp knife. Tie up the two pieces of meat with string to hold their shape while cooking. Crush the leek, garlic and ginger together. A food processor works very well for this. Combine the condiments with the remaining ingredients and mix well. Pour over the pork and marinate in the refrigerator for three hours, using a non-aluminium shallow pan. Turn over the pork occasionally.
    • Preheat the oven 400F (200C). Grill the pork for about 40 minutes, brushing with the remaining marinade at least twice during the cooking process. Cool slightly, remove the string and slice thinly.

    Notes

    *Barbecued Pork is just one of the many garnishes used for Ramen.
    A serving usually consists of three to four slices.
    **Any left-over pork may be frozen and used another time.
    Tried this recipe?Let us know how it was!

    Barbecued Pork (Chashu) for ramen

    Want More Ramen Recipes?

    Check out the Art of Ramen post with the history or ramen, ramen cooking tips, and all 5 reciepes in the Art of Ramen series:


    Get FREE Japanese Recipes by Email! Sign Up Now!

    Japanese salad dressing recipes
    .